If our computer has a dynamic IP, we can create a hostname that points to our IP address. A hostname is very useful because it allows us to use a static name (ie. myname.host.org) instead of a dynamic IP. For example, we can think to use a hostname to contact a remote computer with a dynamic IP address.
There's a very simple way to do that: we can use a free service provided by DynDNS.com:
 Redirect your browser here and create an account.
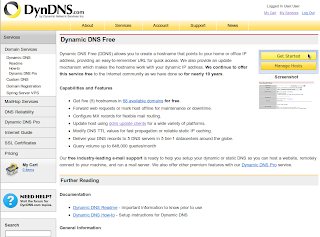
As you can see, "Dynamic DNS Free (DDNS) allows you to create a hostname that points to your home or office IP address, providing an easy-to-remember URL for quick access. We also provide an update mechanism which makes the hostname work with your dynamic IP address. We continue to offer this service free to the Internet community as we have done so for nearly 10 years."
The service is free so click on "Get Started".
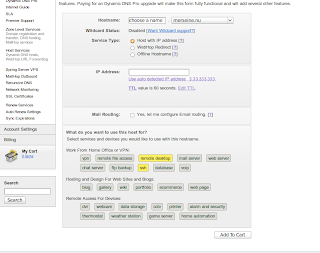
 Insert a name and choose a domain from the combobox. Leave "Host with IP address" selected. Insert the remote IP or "use auto detect IP address". Leave "Mail Routing" unchecked.
Now we have to choose the services we would like to use with our hostname: in my case I selected Remote Desktop and SSH.
Click on "Add to cart" and don't worry: the service is free.
As you can see, our cart now contains free services only. We can activate our hostname.
Click on "Next >>" and then on "Activate Services".
Now we have to find a method to inform DynDNS' servers when our remote computer changes the IP address. Fortunately DynDNS allows us to download an update client: "The update client periodically checks your network's IP address; if it sees that your IP address has changed, it sends (updates) the new IP address to your hostname in your DynDNS.com account".
Cool! Redirect you browser here and download the client for your OS.
In my case, i will use the Linux/Unix client. If you have Ubuntu you can follow next steps:
unpack ddclient, run a terminal and type:
| stefano@SERVER:~$ sudo cp ddclient /usr/sbin/ stefano@SERVER:~$ sudo mkdir /etc/ddclient stefano@SERVER:~$ sudo cp sample-etc_ddclient.conf /etc/ddclient/ddclient.conf stefano@SERVER:~$ sudo gedit /etc/ddclient/ddclient.conf |
uncomment and use following parameters:
protocol=dyndns2 use=web, web=checkip.dyndns.com, web-skip='IP Address' server=members.dyndns.org login= your_username_at_DynDNS password=your_password_at_DynDNS your.hostname.org |
Now we can run ddclient as a daemon at boot time. Run a terminal and type:
| stefano@SERVER:~$ sudo cp sample-etc_rc.d_init.d_ddclient.ubuntu /etc/init.d/ddclient stefano@SERVER:~$ sudo update-rc.d ddclient defaults stefano@SERVER:~$ sudo /etc/init.d/ddclient start |
Done!
Best regards.
