venerdì 29 ottobre 2010

Netbeans - Prevent FrameView from closing

Preventing FrameView from quitting seems to be such a difficult operation. Browsing the internet and testing all of the suggestions, I found out a way to achieve what I want. Let's immagine that we want to build an application called MyProggy. Netbeans' ll create two files, respectively called MyProggyAPP.java and MyProggyView.java. MyProggyApp is the main class, MyProggyView takes care of creating the frame.
In MyProggyApp.java we can modify the startup void in this way (overriding CanExit() and WillExit methods):
    /**
     * At startup create and show the main frame of the 
     * application.
     */
    @Override protected void startup() {
        show(new MyProggyView(this));

        // Create the ExitListener
        ExitListener exitListener = new ExitListener() {    
            public boolean canExit(EventObject arg0) { 
                // return statement
                return false; 
            }

            public void willExit(EventObject arg0) {}
        };
        // Add the Listener
        addExitListener(exitListener);
    }
After that, in MyProggyView.java we can override the WindowClosing void (and WindowIconified, WindowDeiconified...)
    final JFrame frame = this.getFrame();

    frame.addWindowListener(new WindowAdapter() {
        @Override
        public void windowIconified(WindowEvent evt) {
            // Do something
        }

        @Override        
        public void windowClosing(WindowEvent e) {
            // Do something
        }
     });

That's all, we're done.

Best regards.

domenica 17 ottobre 2010

Google Toolbar API - Custom search buttons

We all know the power of Google Toolbar, what we should know is that this extension is API-based: "The Google Toolbar API lets webmasters create custom buttons for the Google Toolbar (version 4 and above) using XML. Buttons can navigate to and search a site, display an RSS feed in a menu, and change their icon dynamically. Users can add your custom buttons to their Toolbar by clicking on a link on your website or Google's Button Gallery."


Adding custom search button is very easy. Unfortunately, at this moment, the API isn't smart enough to always retrieve the right way to interrogate a search engine. Moreover some website hides the correct way to interact with the search engine. It means that we'll have to edit the button using the Advanced Editor. More precisely we have to edit the tag  <search></search>.


Let's make an example. Let's assume that we want to create a custom button to search this blog or, in general, a blog hosted by Blogspot:
  1. Right click on the search box on the right of the page and select "Generate Custom Search..." from the menu that appears
  2. Click on "Add" and then "OK" in the Custom Button installation dialogs
The button will not work because the  API has built up a wrong URL to interrogate the search engine.
Let's open up the advanced editor and we'll see a tag like this:

<search charset="utf-8">http://stefanobolli.blogspot.com/?search={query}</search>

The URL isn't correct, it should be http://stefanobolli.blogspot.com/search?q={query} or, in general, http://username.blogspot.com/search?q={query}.


Let's consider a more difficult case: Ubuntu Forums.
Usually this kind of Forums uses an URL formatted in this way:

Domain Method to search Search Options
http://ubuntuforums.org/ search.php?do=process&query={query} ie:&showposts=1
ie:&forumchoice[]=id

In this case, we must be logged in to search our terms.

Sometimes we can retrieve the correct URL from the address bar, otherwise we should understand what kind of portal we have to deal with (ie: Joomla).


Best regards

mercoledì 13 ottobre 2010

Compiler Error C2733 - second C linkage of overloaded function 'function' not allowed

If we want to use Microsoft Visual C++ 2010 Express to compile a project that includes old Microsoft Platform SDK headers and libraries from previous Express releases, we have to modify Additional include Directories and Additional library Directories.
Microsoft Visual C++ 2010 updates the old Windows SDK adding a new folder in "C:\Program Files" named Microsoft SDKs. This folder contains new headers and new libs, so if we try to compile an old project with persistent references to the old SDK, Visual C++ 2010 will return a bunch of errors C2733 (in my case "second C linkage of overloaded function '_interlockedbittestandset' not allowed").
As said above, the solution is quite easy: update the paths in Additional include Directories and Additional library Directories. (example, from C:\Program Files\\Microsoft Platform SDK\Include    to C:\Program Files\Microsoft SDKs\Windows\v7.0A\include).

Best regards.

martedì 5 ottobre 2010

Compiling Connection plugin C source code to connect messiah's animation to Maya

I'd like to try out the messiahStudio 4.5 Demo version and connect it with Maya 2011. I downloaded the plugin source code to read it. Actually I didn't end to read it, because tons of code may take a lot of time, especially if we don't have a pale idea of how the program works.

I have Visual Studio C++ 2005 Express (if you want to compile the plugin with Visual c++ 2010 read this post) on my notebook, so I skipped the reading and gone directly to compile the plugin, just to have an idea of what kind of monster I have to deal with
I was able to compile the plugin (requirements, for me, Microsoft Platform SDK) after a few quick adjustments (the source is quite old). The most important:
  • References to file paths need to be resynced
  • #include <iostream> instead of #include <iostream.h>
  • "using namespace std;" in MH_NodeObject.cpp, messiahDeformerNode.cpp, pluginMain.cpp.
  • #include <windows.h> in MH_NodeObject.cpp and MH_System.cpp.
  • preprocessor option _DEBUG has to be removed from the release config
Visual Studio returned a few warnings (ie: #pragma warning(disable : 4996) or, better, _CRT_SECURE_NO_DEPRECATE in c++ preprocessor definitions to hide them, for now) but the project was generated.

The next step: test from Maya 2011. The output:
// messiahXform loaded //
// messiahDform loaded //
// messiahMaya loaded //
// messiah command loaded //
"// messiah started //" should appear here
// Error: source messiah; //
// Error: Cannot find file "messiah" for source statement. //
// Error: Cannot find procedure "pmgCreateMenu". //
// Warning: waitCursor stack empty // <- due to errors above

The errors in red are thrown when the plugin executes these calls to the MGlobal::executeCommand method:

// create the messiah menu
// sprintf(txt,"%s\\%s",path,"messiah.mel");
// MGlobal::sourceFile(txt);
stat = MGlobal::executeCommand("source messiah");
stat = MGlobal::executeCommand("pmgCreateMenu");

MGlobal is a static class which provides access to Maya's model. This class provides  also a method for executing MEL commands from within the Maya API. The plugin searches for a mel script (messiah.mel)  to create a menu.
In confirmation of this, I found out (very hard thing, there's not much about this application) that  Messiah 2.5 "added a new menu to the messiahmayaXX.mll plugins. There is a new MEL script in the main messiah directory named messiah.mel. Now, when the messiahmaya plugin is initialized, a new 'messiah' menu will automatically be added to the main maya menu allowing you at add the xformer, deformer or bring up the messiah interface. You can also change the scale or query the current scale."
Unfortunately there's not a mel script in the package I downloaded from projectmessiah.com.
For now I can't figure out how to fix the problem without the mel script and commenting out the code above is the best choice.
By the way,  a reading of interest  about the argument here.

Mel scripts apart, reading the code I realized that I had to take care  to define the host application name  (Maya) and  the module name (messiahMaya2011.mll) in params.h and in c++ preprocessor definitions. These constants are passed as arguments to a couple of functions (ie: messiahStart(...))
Now, the plugin should load messiahHOST.dll (ok) and then initialize Messiah.  Actually the application starts to load its libraries but, at a certain point, something wrong (code e06d7363: unhandled exception) happens  while executing MH_System::_beginSession():

First-chance exception at  0x00000000 in maya.exe: 0xc0000005: Access violation reading location  0x00000000.

"A first chance exception is basically when an exception occurs and gives your code the "first chance" of handling it in a catch() block. If you don't handle the exception, and no one else does then your code receives an unhandled exception and is exited".

Messiah loads its own library, Filemode.dll, and Maya crashes.


(294.a60): Access violation - code c0000005 (first chance)

First chance exceptions are reported before any exception handling.
This exception may be expected and handled.
eax=00000000 ebx=781c1bf8 ecx=7817ab1f edx=29e22d58 esi=01649779 edi=2d875ff8
eip=00000000 esp=01649740 ebp=000000da iopl=0 nv up ei pl nz na pe nc
cs=001b ss=0023 ds=0023 es=0023 fs=003b gs=0000 efl=00210202
00000000 ?? ???
*** ERROR: Symbol file could not be found. Defaulted to export symbols for C:\Programmi\pmG\messiahStudio4.5...Filemode.dll -
0:000> !analyze -v
*******************************************************************************
*                                                         *
* Exception Analysis *
* *
*******************************************************************************

FAULTING_IP:
+0
00000000 ?? ???


EXCEPTION_RECORD: ffffffff -- (.exr ffffffffffffffff)
ExceptionAddress: 00000000
ExceptionCode: c0000005 (Access violation)
ExceptionFlags: 00000000
NumberParameters: 2
Parameter[0]: 00000000
Parameter[1]: 00000000
Attempt to read from address 00000000

FAULTING_THREAD: 00000a60

PROCESS_NAME: maya.exe

OVERLAPPED_MODULE: AnimateMode

DEFAULT_BUCKET_ID: CORRUPT_MODULELIST_OVERLAPPED_MODULE


ERROR_CODE: (NTSTATUS) 0xc0000005 - L'istruzione a "0x%08lx" ha fatto riferimento alla memoria a "0x%08lx". La memoria non poteva essere "%s".

READ_ADDRESS: 00000000

BUGCHECK_STR: ACCESS_VIOLATION

THREAD_ATTRIBUTES:
LAST_CONTROL_TRANSFER:
LAST_CONTROL_TRANSFER: from 2a630ef3 to 00000000

STACK_TEXT:
0164973c 2a630ef3 2d875ff8 781c1bf8 7817775d 0x0
WARNING: Stack unwind information not available. Following frames may be wrong.
fffffffe 00000000 00000000 00000000 00000000 Filemode!InitFunction+0xf2d3

FAILED_INSTRUCTION_ADDRESS:
+0
00000000 ?? ???

FOLLOWUP_IP:
Filemode!InitFunction+f2d3
2a630ef3 8b0db4de7a2a mov ecx,[Filemode!MemSort+0x173084 (2a7adeb4)]

SYMBOL_STACK_INDEX: 1

FOLLOWUP_NAME: MachineOwner

SYMBOL_NAME: Filemode!InitFunction+f2d3

MODULE_NAME: Filemode

IMAGE_NAME: Filemode.dll

DEBUG_FLR_IMAGE_TIMESTAMP: 4b84579a

STACK_COMMAND: ~0s ; kb

FAILURE_BUCKET_ID: ACCESS_VIOLATION_BAD_IP_Filemode!InitFunction+f2d3

BUCKET_ID: ACCESS_VIOLATION_BAD_IP_Filemode!InitFunction+f2d3

Followup: MachineOwner

---------

The ACCESS_VIOLATION_BAD_IP is a bad instruction pointer, we're jumping from 2a630ef3 to an invalid memory address (00000000). We don't have debug symbols for Filemode.dll and we can't run Maya in debug mode on Windows.

I tried to compile the plugin for Alias Maya 6.5 (on the left) and obviously it works fine with Messiah 4.5. Now, without entering useless and boring debug details, the problem shouldn't be the plugin itself, because the only different thing here is Maya.

That's all for now, we'll see.

Best regards.

sabato 2 ottobre 2010

New version of CGPersia Toolbar for Firefox

CGPersia Toolbar 0.1 is under approval control by Mozilla
In the meantime it's possible to download the new version here.
This release is compatible with Firefox 2.0 - 3.6.*.


Changelog:
  • Removed links to no more existing Forums.
  • Added links to new Forums.
  • Added 3 new drop-down buttons to dynamically retrieve Latest Posts, Hottest and Most Viewed Threads.
  • Added an Options Window.
  • Added the possibility to remove the new drop-down buttons through the Options Window.
  • Added the feature to save and reload the search history.
  • Added the file translations.dtd in locale/en-US to store tooltips and labels.
  • The extension now uses a new icon set. 
To-Do List:
  • Advanced search window.
  • A toolbar button for the Blog.
  • A method to drag and drop links onto a target programmed to run external applications (ie: JDownloader).
  • Drop-down button for bookmarked pages.
Best regards.

    sabato 11 settembre 2010

    Adding row to a JTable that uses AbstractTableModel (Java 1.6)

    I'm writing a Java program that uses JTable and AbstractTableModel. As usual, I like to improvise, I like to add features following the inspiration. This time I wanted to create a table with static data, but at a certain point...hey, why not adding data dynamically? 
    This way of life is funny but can create a lot of problems: I'm stubborn and I want to fix them.
    "Every table object uses a table model object to manage the actual table data. A table model object must implement the TableModel interface. If the programmer does not provide a table model object, JTable automatically creates an instance of DefaultTableModel."
    DefaultTableModel can easily add/remove a row, but what happens if we want to use AbstractTableModel?
    I browsed the internet but I wasn't able to find a solution: people suggest to use DefaultTableModel (too easy), to call the superclass method fireTableRowsInserted(), or fireTableDataChanged() and fireTableRowsUpdated(int firstRow, int lastRow)...
    These solutions don't work for me.
    I found a fix experimenting a lot of ideas but the solution is quite easy: we have to pass the new data to the AbstractTableModel and call:

    table.revalidate();
    table.repaint();
    tableModel.fireTableDataChanged();

    That's all! Below a concrete example, the code I'm  using:

    import java.stuff...

    private JTable table;

    private Object[][] newData, oldData;

    MyTableModel myTableModel;

         public myClass() {

             newData = {{"Kathy", "Smith",
                         "Snowboarding", new Integer(5), new Boolean(false)},
                        {"John", "Doe",
                         "Rowing", new Integer(3), new              Boolean(true)},
                        {"Sue", "Black",
                         "Knitting", new Integer(2), new  Boolean(false)},
                        {"Jane", "White",
                         "Speed reading", new Integer(20), new Boolean(true)},
                        {"Joe", "Brown",
                         "Pool", new Integer(10), new Boolean(false)}


              myTableModel = new MyTableModel();
              myTableModel.setData(newData);

              table = new JTable(myTableModel);
              // add features to the table here
         }

         /**
          * This method adds a row to the table. We have to
          * append the new row to the existing data, pass new
          * data to AbstractTableModel
          */
          private void addRow() {
              oldData = newData;
              newData = new Object[oldData.length + 1][];

              // Copy old data to new data
              for (int x = 0; x < oldData.length; x++) { 

                  newData[x] = oldData[x]; 
              } 

             // Append new row 
             newData[oldData.length] = new Object[]{new Boolean(true)}; 

             // Pass the new data to the table model
             myTableModel.setModelData(newData); 

             // Update the table 
             table.revalidate(); 
             table.repaint();

             myTableModel.fireTableDataChanged();
        } 

        class MyTableModel extends AbstractTableModel { 
           // Static column Names 
          private String[] columnNames = {"bla", "bla", "bla", 
                                          "bla", "bla"}; 
          // Data to populate the table 
          private Object[][] data; 

          public void setData(Object[][] data){ 
              this.data = data; 
          } 

          @Override 
          public int getColumnCount() { 
              return columnNames.length; 
          } 

          @Override 
          public int getRowCount() { 
              return data.length; 
          } 

          @Override 
          public String getColumnName(int col) { 
              return columnNames[col]; 
          } 

          @Override 
          public Object getValueAt(int row, int col) { 
              return data[row][col]; 
          }  

          @Override 
          public Class getColumnClass(int c) { 
              return getValueAt(0, c).getClass(); 
          }  

          @Override 
          public boolean isCellEditable(int row, int col) { 
               return true; 
          } 
          
          @Override 
          public void setValueAt(Object value, int row, int col) { 
              data[row][col] = value; 
              fireTableCellUpdated(row, col); 
          } 
        }

    I apologize if blogspot doesn't format the code in the right way and I hope this solution will work for you as it does for me.

    Best regards.

    domenica 5 settembre 2010

    40tude Dialog - Write access error

    40tude Dialog worked fine on my Windows 7 x64 until today: if I run 40tude, this message box appears:

    You don't have necessary write access to "C:\Program Files (x86)\40tude Dialog"

    We can fix the error if we change the compatibility mode:
    1. Right click on the 40tude' shortcut or on dialog.exe
    2. Click on Properties
    3. Check the Run this program in compatibility mode for checkbox
    4. Select Windows XP (Service Pack 3) and click Apply
    Now 40tude should run again (in my case this fix worked). We can quit the program and disable the compatibility mode.

    Best regards.

    sabato 4 settembre 2010

    IR receivers (Animax)

    I was looking around in an electronic and hardware store a couple of weeks ago and I saw two left IR receivers (a TSOP1730 and a TSOP1333). I knew these electronic components are quite difficult to find, at least in the town where I use to spend my holidays, so I bought them to build a couple of IR receivers to remote control an old TV card and MPlayer (and Totem, vlc, tvtime...).
    I've never soldered components onto a stripboard in my life but the hardware layout is very simple and I have fun building things on my own.
    Modern computers do not include RS232 serial ports anymore but in my holidays house I have this prehistoric PC with two serial ports (COM1 and COM2) so...why not?
    I used the following components for the first receiver:
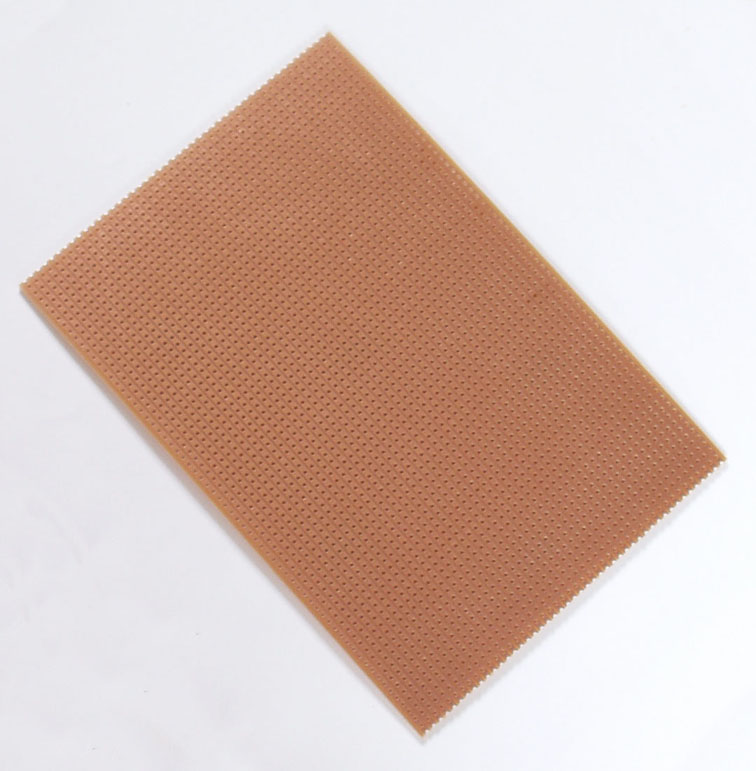
    1. A stripboard.
    2. Vishay Telefunken TSOP1730 (the Photo Module for PCM Remote Control Systems receiver - carrier frequency = 30 kHz).
    3. A positive voltage regulator L7805CV (output voltage of 5 V) .
    4. One female serial connector RS232.
    5. Switching diode 1N4148 (cathode --> black band).
    6. 4.7 uF Electrolytic Capacitor (cathode is the shorter pin).
    7. One 4.7K Ohm resistor (no matter what direction of assembly we'll use).
    There's plenty of tutorials over the internet and I won't write the nth (obsolete) howto but a couple of things I deducted building my own receivers:


    The assembly is very easy: we can insert the pieces into the stripboard and realize all of the connections between the components melting the resin cored electrical solder (because it's a conductor). The bottom of the stripboard should look like the image on the right (image taken from http://usbirboy.sourceforge.net/). We don't need to realize a professional soldering but we have to avoid to cross the connections, so a minimal project is required.

    The components are very small and delicate. It's very easy to break them, so we need to insert the stripboard into something resistant. I used an old mouse to contain the stripboard (my beautiful cat jumps on my desk continually). This kind of "case" could limit the reception and the project should take it into account. My first receiver works fine with all of my remote controls: I'm using a Philips SRP4004/87 because it has dedicated buttons for DVD, VCR, TV and STB.

    I'm building another, more complicated, receiver into the box of a serial connector RS232. The space is minimal and it's very hard to keep the components separated. And I don't know if the TSOP1333 will work. Anyway I'd like to build a self-made USB receiver. I will try the complete kit in the fanshop as soon as possible, assembling it should be very funny.


    It's very easy to set up the remote control on Ubuntu: type these commands in a terminal:


     # The serial port is configured as COM, we have to disable it with setserial
     stefano@SERVER:~$ sudo apt-get install setserial
     # We can disable permanently the serial port as uart
     # Let's choose "manual"
     stefano@SERVER:~$ sudo dpkg-reconfigure setserial

     # We have to modify/create the file autoserial.conf
     # and insert the line /dev/ttyS0 uart none
     stefano@SERVER:~$ sudo gedit /var/lib/setserial/autoserial.conf

     # We have to copy autoserial.conf to /etc/serial.conf
     stefano@SERVER:~$ sudo cp /var/lib/setserial/autoserial.conf /etc/serial.conf

     # Now we can install Lirc
     stefano@SERVER:~$ sudo apt-get install lirc lirc-modules-source module-assistant

     # and set up it choosing "custom" for the remote control,
     # none for the transmitter and /dev/ttyS0 for the serial port
     stefano@SERVER:~$ sudo dpkg-reconfigure lirc-modules-source

     # Now we can set up the remote control
     stefano@SERVER:~$ sudo /etc/init.d/lirc stop
     stefano@SERVER:~$ sudo irrecord -f -d /dev/lirc0 lircd.conf
     stefano@SERVER:~$ sudo move lircd.conf /etc/lirc
     stefano@SERVER:~$ sudo /etc/init.d/lirc restart

    My /etc/lirc/hardware.conf:


    # /etc/lirc/hardware.conf
    #
    #Chosen Remote Control
    REMOTE="Custom"
    REMOTE_MODULES="lirc_dev lirc_serial"
    REMOTE_DRIVER=""
    REMOTE_DEVICE="/dev/lirc0"
    REMOTE_SOCKET=""
    REMOTE_LIRCD_CONF=""
    REMOTE_LIRCD_ARGS=""

    #Chosen IR Transmitter
    TRANSMITTER="None"
    TRANSMITTER_MODULES=""
    TRANSMITTER_DRIVER=""
    TRANSMITTER_DEVICE=""
    TRANSMITTER_SOCKET=""
    TRANSMITTER_LIRCD_CONF=""
    TRANSMITTER_LIRCD_ARGS=""

    #Enable lircd
    START_LIRCD="true"

    #Don't start lircmd even if there seems to be a good config file
    #START_LIRCMD="false"

    #Try to load appropriate kernel modules
    LOAD_MODULES="true"

    # Default configuration files for your hardware if any
    LIRCMD_CONF="/etc/lirc/lircd.conf"

    #Forcing noninteractive reconfiguration
    #If lirc is to be reconfigured by an external application
    #that doesn't have a debconf frontend available, the noninteractive
    #frontend can be invoked and set to parse REMOTE and TRANSMITTER
    #It will then populate all other variables without any user input
    #If you would like to configure lirc via standard methods, be sure
    #to leave this set to "false"
    FORCE_NONINTERACTIVE_RECONFIGURATION="false"
    START_LIRCMD=""

    and my /etc/lirc/lircd.conf:


    # Please make this file available to others
    # by sending it to
    #
    # this config file was automatically generated
    # using lirc-0.8.6(default) on Mon Aug 23 23:59:44 2010
    #
    # contributed by Stefano Bolli
    #
    # brand: Philips
    # model no. of remote control: SRP4004/87
    # devices being controlled by this remote:
    #

    begin remote

    name Philips_SRP4004/87
    flags RAW_CODES|CONST_LENGTH
    eps 30
    aeps 100

    gap 107808

    begin raw_codes

    name KEY_TV
    2749 825 501 846 469 430
    505 393 1403 1294 538 358
    506 393 506 393 506 390
    508 391 474 427 469 430
    472 425 471 427 954 396
    471 425 506 844 503 395
    506 393 503

    name KEY_POWER
    2718 858 502 844 503 395
    502 397 472 875 955 390
    506 395 506 393 501 423
    476 423 480 393 538 359
    503 398 501 396 505 393
    506 393 538 361 919 426
    471 878 471 455 446

    name KEY_QUESTION
    2717 857 506 843 504 395
    538 359 1436 1260 501 398
    572 320 475 430 469 428
    503 395 469 431 503 395
    954 391 506 843 504 395
    954 393 506 843 504 393
    506

    name KEY_MENU
    2751 825 506 843 504 393
    501 395 506 844 988 359
    471 430 501 395 506 393
    471 428 503 395 504 395
    472 425 508 393 954 841
    920 876 954 846 501 395
    506

    name KEY_INFO
    2749 825 506 843 503 394
    503 396 1370 1326 469 430
    503 393 504 396 505 395
    501 394 508 393 503 393
    506 393 506 393 503 421
    480 393 987 386 478 395
    504 423 476

    name KEY_EXIT
    2751 822 503 844 471 428
    505 393 504 846 954 390
    506 399 500 395 502 397
    467 430 471 443 486 395
    506 395 472 427 918 913
    471 391 505 393 508 394
    535 361 954

    name KEY_LEFT
    2718 860 504 866 476 398
    503 393 1402 1294 472 425
    542 356 508 393 472 425
    503 396 471 428 505 394
    471 427 954 844 919 426
    505 846 952 844 537

    name KEY_UP
    2782 791 503 844 503 420
    478 398 469 876 956 393
    472 427 536 363 471 426
    537 361 506 393 504 395
    503 396 469 427 922 878
    952 418 446 876 474 427
    471 428 501

    name KEY_RIGHT
    2748 825 472 875 502 395
    506 395 1402 1297 499 393
    508 393 505 393 501 400
    467 428 501 398 503 395
    506 393 952 846 952 395
    503 844 952 395 504

    name KEY_DOWN
    2748 851 514 809 469 453
    478 396 469 880 917 453
    446 428 471 428 469 429
    504 395 504 395 471 426
    503 423 478 419 928 844
    920 429 501 872 512 359
    922

    name KEY_SELECT
    2717 859 469 881 498 396
    469 457 1409 1260 469 455
    513 360 504 418 481 395
    501 396 471 425 471 455
    446 453 895 878 951 396
    468 428 471 878 539 358
    473

    name KEY_RED
    2716 860 468 876 504 420
    479 395 469 878 952 397
    469 430 469 428 468 430
    471 428 506 393 469 430
    471 425 471 455 892 433
    469 878 951 419 446 880
    917

    name KEY_GREEN
    2718 858 503 846 503 393
    504 395 1403 1293 472 427
    469 430 469 428 471 427
    538 361 506 391 505 393
    541 358 922 427 504 844
    954 393 471 428 503 846
    501

    name KEY_YELLOW
    2714 860 469 903 444 455
    444 453 448 876 919 453
    513 388 478 419 445 426
    471 430 471 453 441 458
    443 430 469 455 925 420
    446 903 927 420 446 428
    501 423 444

    name KEY_BLUE
    2714 859 469 878 504 395
    499 398 1370 1352 510 361
    503 396 503 398 501 395
    538 362 503 395 538 358
    541 361 919 428 505 391
    474 876 503 395 469 428
    473 425 506

    name KEY_VOLUMEUP
    2716 858 503 846 501 395
    501 396 506 843 920 427
    538 361 474 423 508 393
    503 393 506 393 506 395
    501 396 503 398 503 391
    540 361 954 841 506 395
    538 357 471 457 442

    name KEY_VOLUMEDOWN
    2718 859 501 844 505 393
    470 429 1402 1295 471 425
    503 398 504 395 501 396
    471 427 469 430 469 428
    471 432 469 423 508 395
    915 881 503 394 473 453
    960

    name KEY_MUTE
    2750 825 506 843 502 395
    503 396 505 842 956 394
    503 393 505 393 472 427
    504 393 474 427 471 425
    506 393 471 430 501 396
    538 363 469 425 956 396
    503 844 919

    name KEY_BACK
    2716 859 469 879 505 393
    501 398 1400 1294 506 393
    471 428 538 361 503 391
    471 430 506 393 471 425
    472 427 538 361 506 395
    469 430 917 881 951 844
    503

    name KEY_CHANNELUP
    2716 882 446 904 443 455
    444 430 538 834 894 453
    446 453 444 453 446 427
    472 455 510 386 444 455
    444 455 446 453 478 420
    895 903 444 430 466 456
    475 423 444 455 444

    name KEY_CHANNELDOWN
    2751 824 504 869 480 419
    478 395 1400 1296 469 428
    471 428 469 427 471 428
    472 427 506 418 446 453
    478 397 502 398 951 844
    501 395 504 397 470 427
    952

    name KEY_PAGEDOWN
    321

    name KEY_PAGEUP
    2752 827 501 846 467 430
    503 395 1403 1319 476 421
    480 418 481 395 469 428
    471 430 467 429 471 426
    471 430 469 452 481 421
    441 457 927 418 515 359
    503 396 535

    name KEY_REWIND
    2749 851 475 874 443 430
    504 420 444 878 920 452
    446 453 444 455 444 455
    446 427 469 453 478 421
    444 455 894 453 478 395
    469 904 929 868 961 386
    444

    name KEY_PLAY
    2753 825 504 843 504 420
    478 396 1402 1290 505 421
    480 396 501 395 504 395
    504 393 505 393 506 396
    951 396 503 844 951 846
    501 396 954 395 504

    name KEY_FASTFORWARD
    2720 854 472 906 442 456
    443 453 448 874 922 453
    443 455 444 453 448 453
    444 452 446 453 446 455
    444 453 894 453 446 452
    446 904 892 876 924 873
    471

    name KEY_STOP
    2713 888 478 869 443 428
    503 398 1368 1326 536 363
    501 396 507 416 481 393
    503 396 506 390 506 393
    922 880 502 420 444 453
    926 398 437 487 478 393
    471

    name KEY_RECORD
    1886 788 993 804 991 807
    989 808 991 1703 992 806
    991 807 991 804 1892 1706
    988 807 1887

    name KEY_PAUSE
    2750 825 503 844 504 393
    540 358 508 842 954 393
    505 391 508 391 540 359
    506 393 508 391 505 393
    506 393 956 842 506 393
    954 841 508 391 538 360
    538 361 504

    name KEY_1
    2750 851 443 904 446 450
    481 420 1378 1289 506 420
    478 421 478 421 478 418
    481 420 479 418 479 420
    478 423 478 418 478 421
    446 451 478 423 443 456
    443 453 931

    name KEY_2
    2752 851 446 876 471 427
    506 393 469 878 918 429
    471 428 471 428 503 396
    503 393 506 393 540 361
    502 395 471 428 471 427
    504 395 471 453 478 393
    506 393 956 841 472

    name KEY_3
    2716 859 472 875 538 361
    504 395 1368 1326 501 396
    505 396 572 324 504 393
    540 361 505 391 506 396
    470 428 503 394 505 396
    505 393 470 427 471 428
    956 393 501

    name KEY_4
    2786 789 542 805 540 359
    540 356 545 804 957 391
    540 358 543 354 545 356
    508 389 542 356 543 359
    540 356 543 356 510 389
    540 358 541 358 541 356
    991 807 542 356 541

    name KEY_5
    2750 823 471 878 499 398
    503 395 1403 1317 480 396
    501 395 506 418 547 324
    472 432 467 429 504 393
    471 428 508 391 506 392
    501 423 481 393 954 844
    917

    name KEY_6
    2712 860 503 844 471 430
    503 396 503 844 919 426
    473 428 503 395 472 425
    469 430 505 391 474 427
    506 393 538 361 503 396
    468 430 502 395 506 393
    921 430 504 841 501

    name KEY_7
    2752 823 469 903 446 455
    444 453 1342 1327 471 455
    444 453 448 450 446 455
    444 453 444 455 443 456
    446 452 444 453 446 453
    444 457 444 452 895 425
    540 361 472

    name KEY_8
    2784 791 501 846 501 398
    503 393 504 871 894 428
    535 363 504 393 506 420
    513 361 471 451 446 427
    506 393 469 430 506 393
    471 428 468 428 956 842
    469 455 478 395 539

    name KEY_9
    2719 857 502 848 501 395
    504 397 1401 1294 501 395
    471 428 504 390 511 393
    471 425 508 394 503 395
    502 395 469 432 501 393
    506 395 955 841 471 430
    954

    name KEY_TEXT
    2782 791 503 842 507 391
    508 393 504 843 956 391
    506 393 510 389 503 393
    508 393 506 393 504 393
    508 391 956 393 538 358
    541 358 508 842 954 841
    956

    name KEY_0
    2751 825 504 843 471 428
    506 390 1373 1324 471 428
    505 393 474 425 472 427
    504 395 469 430 538 358
    504 395 506 393 474 425
    471 428 471 425 508 393
    506 393 469 428 505

    name KEY_HELP
    2752 850 479 868 479 420
    478 419 480 869 927 420
    479 420 478 421 478 421
    478 419 478 420 481 418
    478 421 929 418 481 869
    928 419 480 869 929 393
    501

    end raw_codes

    end remote

    I used mythbuntu-lirc-generator for initially setting up an ordinary Ubuntu system's remote control. Below a lircrc file generated by Mythbuntu Lirc Generator to control Totem.


    # LIRCRC Auto Generated by Mythbuntu Lirc Generator
    # Author(s): Mario Limonciello, Nick Fox, John Baab
    # Created for use with Mythbuntu
    begin
    remote = Philips_SRP4004/87
    prog = totem
    button = KEY_POWER
    config = quit
    repeat = 0
    delay = 0
    end

    begin
    remote = Philips_SRP4004/87
    prog = totem
    button = KEY_MENU
    config = menu
    repeat = 0
    delay = 0
    end

    begin
    remote = Philips_SRP4004/87
    prog = totem
    button = KEY_INFO
    config = show_playing
    repeat = 0
    delay = 0
    end

    begin
    remote = Philips_SRP4004/87
    prog = totem
    button = KEY_EXIT
    config = quit
    repeat = 0
    delay = 0
    end

    begin
    remote = Philips_SRP4004/87
    prog = totem
    button = KEY_LEFT
    config = left
    repeat = 0
    delay = 0
    end

    begin
    remote = Philips_SRP4004/87
    prog = totem
    button = KEY_UP
    config = up
    repeat = 0
    delay = 0
    end

    begin
    remote = Philips_SRP4004/87
    prog = totem
    button = KEY_RIGHT
    config = right
    repeat = 0
    delay = 0
    end

    begin
    remote = Philips_SRP4004/87
    prog = totem
    button = KEY_DOWN
    config = down
    repeat = 0
    delay = 0
    end

    begin
    remote = Philips_SRP4004/87
    prog = totem
    button = KEY_VOLUMEUP
    config = volume_up
    repeat = 0
    delay = 0
    end

    begin
    remote = Philips_SRP4004/87
    prog = totem
    button = KEY_VOLUMEDOWN
    config = volume_down
    repeat = 0
    delay = 0
    end

    begin
    remote = Philips_SRP4004/87
    prog = totem
    button = KEY_MUTE
    config = mute
    repeat = 0
    delay = 0
    end

    begin
    remote = Philips_SRP4004/87
    prog = totem
    button = KEY_BACK
    config = quit
    repeat = 0
    delay = 0
    end

    begin
    remote = Philips_SRP4004/87
    prog = totem
    button = KEY_REWIND
    config = seek_backward
    repeat = 0
    delay = 0
    end

    begin
    remote = Philips_SRP4004/87
    prog = totem
    button = KEY_PLAY
    config = play_pause
    repeat = 0
    delay = 0
    end

    begin
    remote = Philips_SRP4004/87
    prog = totem
    button = KEY_FASTFORWARD
    config = seek_forward
    repeat = 0
    delay = 0
    end

    begin
    remote = Philips_SRP4004/87
    prog = totem
    button = KEY_PAUSE
    config = pause
    repeat = 0
    delay = 0
    end

    begin
    remote = Philips_SRP4004/87
    prog = totem
    button = KEY_SELECT
    config = select
    repeat = 0
    delay = 0
    end

    begin
    remote = Philips_SRP4004/87
    prog = totem
    button = KEY_STOP
    config = stop
    repeat = 0
    delay = 0
    end

    begin
    remote = Philips_SRP4004/87
    prog = totem
    button = KEY_BLUE
    config = fullscreen
    repeat = 0
    delay = 0
    end

    On Windows I use Girder . WinLirc has some problem with my remote control. The latest free release of Girder (3.29b?) works fine with my Pinnacle PCTV and vlc 0.86 (we can't use the latest versions because Girder has problems with the QT libraries).

    Best regards.

    sabato 7 agosto 2010

    Problem with Google Images and Firefox 3.6.8

    EDIT: Solution here.

    In my holidays house I cannot search Google Images. Recently Google changed the design of its image search engine and I have been experiencing a problem with Firefox and other browsers on Ubuntu and Windows.
    If I try to search Google Images, Firefox hangs loading the results, no image is shown at all and Google related sites are unreachable for a little while (it's still possible to browse other sites) :


    I think it's impossible to revert Google Images to its old design, so I  thought to use Google Mobile to search images because I can browse it with my smartphone without problems.
    It's quite easy to use Google Mobile to search images: we can use a string formatted in this way:

    "http://www.google.com/m/search?site=images&q=" + search terms

    for example:

    http://www.google.com/m/search?site=images&q=firefox+ubuntu

    I wrote a simple search plugin for the Firefox Search bar to search images with Google Mobile.

    Copy this text:


    <OpenSearchDescription xmlns="http://a9.com/-/spec/opensearch/1.1/"
    xmlns:moz="http://www.mozilla.org/2006/browser/search/">
    <ShortName>Google Mobile Images</ShortName>
    <Description>Search images with Google Mobile</Description>
    <InputEncoding>inputEncoding</InputEncoding>
    <Image width="16" height="16" type="image/x-icon">data:image/x-icon;base64,iVBORw0KGgoAAAANSUhEUgAAABAAAAAQCAYAAAAf8/9hAAAAAXNSR0IArs4c6QAAAARnQU1BAACxjwv8YQUAAAAgY0hSTQAAeiYAAICEAAD6AAAAgOgAAHUwAADqYAAAOpgAABdwnLpRPAAAA09JREFUOE8lk21sFFUYhd+ZKUaaStsfmBhAG6OIYGNM0G671CrExjYaMAhYEyAR5Y/48csPXI20bLUoUCxWWvxszEqRYFttYYMWFdBKmhaIRW2lX6JUdmm722ZhO7vz+M7448y9c+ee8573zL0iItgp6B4YJW9jiIxHPqP60FnSpEjGJjhRUkSfIcyYJmndmxaThL6P69zlSsoGB1hVdRRZF8bc1M2cp77lz3/i+iFF4tc+LmVlemTHsEgr2RWISgbDpgooF9u2uW1LB7KpC9nci1T8QNVX5zxl1WC4tJSkGKQsIWkYTIpFREWGXAdOWhV0kz/Qibn+J8zNXZhPnmTdrh5X2tXnwupVTGtFlJRW8pSOfyu537RcB65Cmsrmc8jqMBlPn8Z84jsqart0VS1cg5/vXMSPN11H68JcOvJy6c6ZxYjad7ORgZErXgZjsQSLtrQjjx9jzvow4d6L3npD634WvJiHvF+AVV+M1PmZXXMfRc/ks2NJNnLHhk841HleTThMxJN8enyQ/tErXvXg0Qak8i6sRj/WviKkvkBRiLFH53UlGG8tR+auPUDOyg9Z/kKI7U2d/6emvR/v/wXz5VuQ/fciDUpsLMDYu8yD7PZhvFOsAverg4om5q/5nOvLPyb34X0MjcVwHIeR6EUWNj6G7M3H/KBQ4de5D/M9P8buYkwVkBofcmvZLnwbPmLtG208X/s9vf3jnn1Hn5F4hNIDz2LszFfrWln796ACskOxXRE6dobIuJc3M5N9jF1oYbC3nqtTl71fOKMnrSz0nIosVrJWrPVr9ULkbRUMKty/OPXvGXpafAy1ZPJXuzB62OR882Ji0T+8TH4bG+aG6hIlF2K9uwyzRisHtf9timv2NN2hAia+0aN6ysQ+kUmiczaXDwoDLeVeHm6ut+9Zoz0vRXZqC9XFzNq2AuN1FYhHB/m9aR5XwznEwlnE27OZbMtm+ut5XPrybkhOkbAdFgTLlahhBh/UUV28+QDymjqxUw5DRzYS/SKLydYbibXN9cixgzczfjLgZdN8+gjWS/dgVOl5qNRW3MpbFa+ucG+kXufpKJFTASY6VhJrfUjHR0n01JG0E5wdGWT+K2VKWIoZUHLArazhbVUnyv0Pap2Kdp9xgc4AAAAASUVORK5CYII=</Image>
    <Url type="text/html" method="GET" template="http://www.google.com/m/search?site=images&amp;q={searchTerms}" />
    </OpenSearchDescription>

    and paste into your preferred text editor, save as gm.xml in

    ~/.mozilla/firefox/xxxxxxxx.default/searchplugins

    Restart Firefox and the plugin will be added to pre-loaded search engines:


    It's possible to use it on windows too (Shortcut Win + R --> %appdata%\mozilla\firefox\profiles).

    A best solution comes from my brother, Massimo: It's possible to bypass the problem using an anonymous web proxy like anonymouse.org. A bookmark with a link like this:

    http://anonymouse.org/cgi-bin/anon-www.cgi/http://www.google.com/imghp

    speeds up the process and works fine.

    Best regards

    venerdì 6 agosto 2010

    Microsoft Wireless Comfort Keyboard 1.0a on Ubuntu Lucid Lynx 10.04

    Many of the multimedia keys of my Microsoft Wireless Comfort Keyboard 1.0a are not predefined on Ubuntu Lucid Lynx 10.04


    Unfortunately  KeyTouch doesn't work for me. Fortunately there are a number of good tutorials to fix this problem. I followed this one:


    and it's a very good howto that I don't want to copy here. I want to report here my own parameters to fully take advantage of my keyboard.
    Pressing  my multimedia keys one by one and using sudo dmesg -c in a gnome-terminal, I discovered the scancodes from outputs like this:

    atkbd.c: Unknown key pressed (translated set 2, code 0xe002 on isa0060/serio0).
    atkbd.c: Use 'setkeycodes e002 ' to make it known.

    Now, before going on, a little explanation: my keyboard has a special button, called "F Bloc" (Function blocks), to enable/disable particular functions for F1, F2...F12  keys and I want to fully take advantage of it.
    Here it is, my /etc/rc.local, you can see the new functions
    for F1, F2...F12  keys in case of F Bloc disabled :

    #!/bin/sh -e
    #
    # rc.local
    #
    # This script is executed at the end of each multiuser runlevel.
    # Make sure that the script will "exit 0" on success or any other
    # value on error.
    #
    # In order to enable or disable this script just change the execution
    # bits.
    #
    # By default this script does nothing

    setkeycodes e00b 180 # Zoom in
    setkeycodes e011 181 # Zoom out
    setkeycodes e005 182 # Messenger
    setkeycodes e015 183 # Calendar
    setkeycodes e016 184 # Disconnect
    setkeycodes e073 185 # Favorites 1
    setkeycodes e074 186 # Favorites 2
    setkeycodes e075 187 # Favorites 3
    setkeycodes e076 188 # Favorites 4
    setkeycodes e077 189 # Favorites 5
    setkeycodes e078 190 # Favorites - Star
    setkeycodes e03b 191 # Help  -> F1
    setkeycodes e008 192 # Undo  -> F2
    setkeycodes e007 193 # Redo  -> F3
    setkeycodes e03e 194 # New   -> F4
    setkeycodes e03f 195 # Open  -> F5
    setkeycodes e040 196 # Close -> F6
    setkeycodes e041 197 # Reply -> F7
    setkeycodes e042 198 # Fwd   -> F8
    setkeycodes e043 199 # Send  -> F9
    setkeycodes e023 200 # Spell -> F10
    setkeycodes e057 201 # Save  -> F11
    setkeycodes e058 202 # Print -> F12
    exit 0

    after that, I added the missing keysyms to the right keycodes in /etc/xmodmap.conf:

    clear Mod1
    add Mod1 = Alt_L
    clear Mod4
    add Mod4 = Tab
    clear Mod5
    add Mod5 = Alt_R
    keycode 188 = XF86ZoomIn NoSymbol XF86ZoomIn
    keycode 189 = XF86ZoomOut NoSymbol XF86ZoomOut
    keycode 190 = XF86Messenger NoSymbol XF86Messenger
    keycode 191 = XF86Calendar NoSymbol XF86Calendar
    keycode 192 = XF86LogOff NoSymbol XF86LogOff
    keycode 193 = XF86Launch0 NoSymbol XF86Launch0
    keycode 194 = XF86Launch1 NoSymbol XF86Launch1
    keycode 195 = XF86Launch2 NoSymbol XF86Launch2
    keycode 196 = XF86Launch3 NoSymbol XF86Launch3
    keycode 197 = XF86Launch4 NoSymbol XF86Launch4
    keycode 198 = XF86Launch5 NoSymbol XF86Launch5
    keycode 199 = XF86Support NoSymbol XF86Support
    keycode 200 = Undo NoSymbol Undo
    keycode 201 = Redo NoSymbol Redo
    keycode 202 = XF86New NoSymbol XF86New
    keycode 203 = XF86Open NoSymbol XF86Open
    keycode 204 = XF86Close NoSymbol XF86Close
    keycode 205 = XF86Reply NoSymbol XF86Reply
    keycode 206 = XF86Forward NoSymbol XF86Forward
    keycode 207 = XF86Send NoSymbol XF86Send
    keycode 208 = XF86Spell NoSymbol XF86Spell
    keycode 209 = XF86Save NoSymbol XF86Save
    keycode 210 = XF86Launch6 NoSymbol XF86Launch6

    Note 1: If I put xmodmap.conf in my home directory, it doesn't work.
    Note 2: I added some extra commands at the top of the file (clear ..., add ...): clear is used to remove all entries in the modifier map for the given modifier,  where valid name are: Shift, Lock, Control, Mod1, Mod2, Mod3, Mod4, and Mod5
    add is a command to reassign all  keys containing the given keysyms to the indicated modifier map. 
    If I don't use these commands, some functions keys (F5, F7, F8, F9) don't work as expected and gnome-keybindind-properties cannot detect them correctly.

    Now I can use gnome-keybinding-properties or xbindkeys-config to bind actions to my fresh configured keys: 


    I took a screenshot of xbindkeys-config to show my settings, but actually I'm using gnome-keybinding-properties because it allows me to zoom in and zoom out without extra configurations.
    As for F1, F2...F12  keys in case of F Bloc disabled, they are used with an email client, according to their labels and Microsoft docs, so I thought to use xdotool to send predefined and existing shortcuts to Evolution.
    I'm writing a script to handle these shortcuts. It's possible to pass arguments to the script in this way: "myEvolutionShortcuts new" to start a new message, "myEvolutionShortcuts reply", "myEvolutionShortcuts send" and so on:

    #!/bin/sh

    # Search and store Evolution - Mail window id
    myEvolutionID=`xdotool search --title "In arrivo"`
    # Search and store Evolution - Compose message window id
    myComposeMessageID=`xdotool search --title "Componi messaggio"`

    case $1 in

    # New message
    new)
    sleep .3
    xdotool windowactivate $myEvolutionID
    xdotool windowfocus $myEvolutionID
    xdotool key "Shift+Control+M" ;;

    # Open message
    open)
    sleep .3
    xdotool windowactivate $myEvolutionID
    xdotool windowfocus $myEvolutionID
    xdotool key "Control+O" ;;

    # Close Evolution
    close)
    sleep .3
    xdotool windowactivate $myEvolutionID
    xdotool windowfocus $myEvolutionID
    xdotool key "Control+W" ;;

    # Reply message
    reply)
    sleep .3
    xdotool windowactivate $myEvolutionID
    xdotool windowfocus $myEvolutionID
    xdotool key "Control+R" ;;

    # Forward message
    forward)
    sleep .3
    xdotool windowactivate $myEvolutionID
    xdotool windowfocus $myEvolutionID
    xdotool key "Control+F" ;;

    # Send message
    send)
    sleep .3
    xdotool windowactivate $myComposeMessageID
    xdotool windowfocus $myComposeMessageID
    xdotool key "Control+F" ;;

    # Spell check
    abc)
    sleep .3
    xdotool windowactivate $myComposeMessageID
    xdotool windowfocus $myComposeMessageID
    xdotool key "F7" ;;

    # Save message
    save)
    sleep .3
    xdotool windowactivate $myComposeMessageID
    xdotool windowfocus $myComposeMessageID
    xdotool key "Shift+Control+S" ;;

    # Print message
    print)
    sleep .3
    xdotool windowactivate $myComposeMessageID
    xdotool windowfocus $myComposeMessageID
    xdotool key "Control+P" ;;

    esac

    exit 0

    The very early version of the script works in this way: it searches the evolution's window id using the first words of its window title, activates and gives focus to the window, finally send the window a predefined shortcut. It's easy to get info about a particular window using the xprop command.
    At this time the script doesn't handle exceptions but it works fine for now and I can use all of my multimedia keys.

    Best regards.