Visualizzazione post con etichetta Maya 2011 Hotfix 2. Mostra tutti i post

mercoledì 1 dicembre 2010

Modeling a Cylon Raider - the wings

I have a couple of free days, so I want to start to model my last homage to Battlestar Galactica, one of my favorite TV Shows.
After the Viper MK II and the Cylon Centurion, it's the turn of the Cylon Raider.

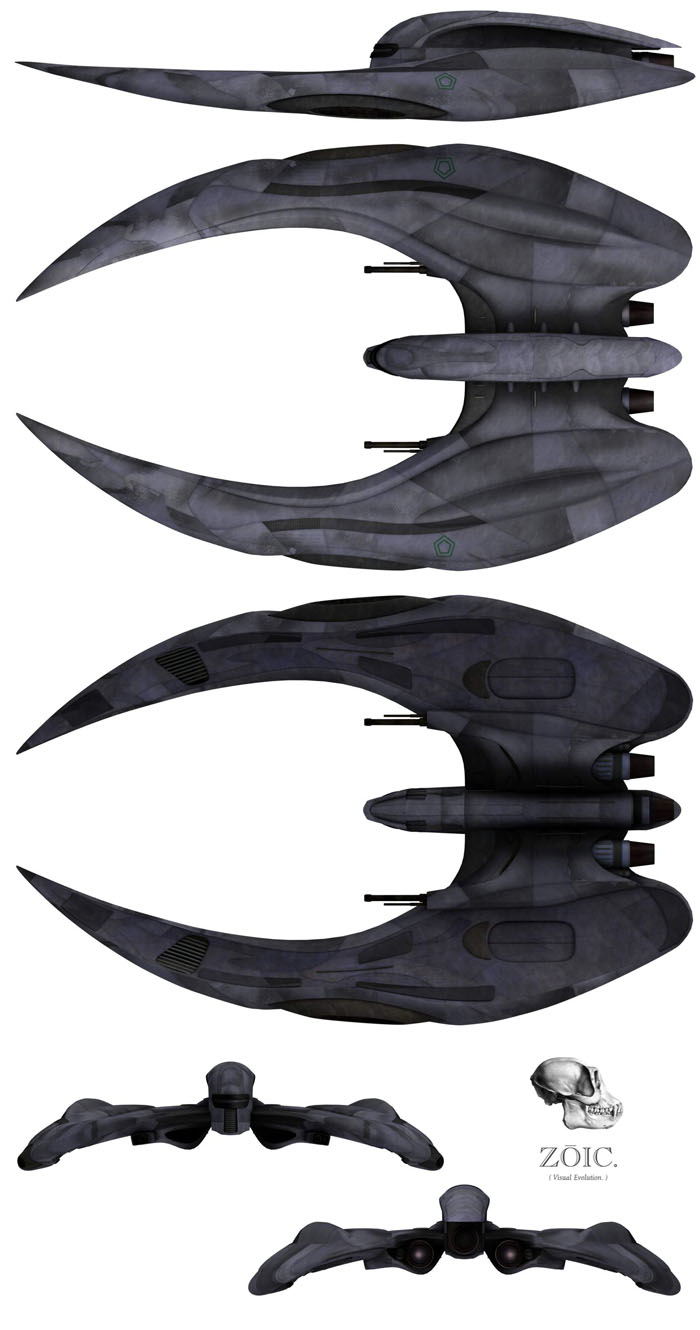
I've found this blueprint as reference, so the first step is to crop all of the images in Photoshop. I will have four different images at the end of the process (top, left, bottom and rear) to import into Maya 2011 as image planes. It's important to use horizontal and vertical guides in Photoshop to resize correctly the images, because the references must have same dimensions.
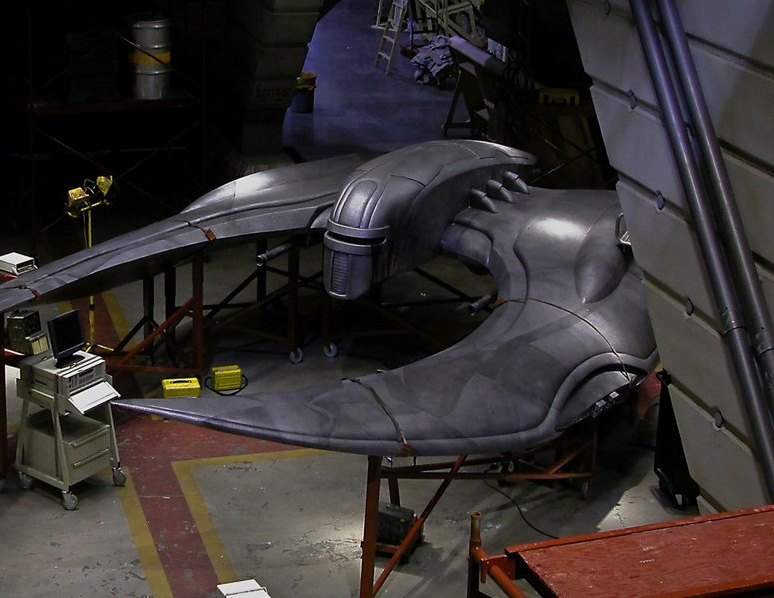

First impressions: the original model is fantastic, I love the design and the final look, this fighter is really awesome. I don't know the authot but I'd like to pay him a compliment. It is interesting to notice that the model is composed of 4 parts: the wings (I can model one of them and then mirror it), the engines, the weapons and the central part. The fighter hasn't a linear design, but it's possible to break down it into 4 parts to ease the modeling process.


I decided to get started from the wings. I think the wings are the funniest and the most difficult part of this model. I'm using traditional methods to model the wing, nothing fancy: I get started from a box, extruded it a lot of times, added some edge rings and moved the vertices to match my reference images. I'd want to create a low poly model, because I'd like to animate a fight between the viper and the raider and obviously the raider will be destroyed.


Anyway, during the modeling process, I prefer to smooth the mesh to see if it's correct and perfectly rounded. This step helps me to notice that the bottom needs some correction.

In the meantime I decided to use the references as texture, so, in a next article, I'd like to share my method to project the images from a camera to create a new texture. First of all I will create the UV maps, then I will project the reference images from a given camera (unfortunately, it's not possible to use an orthographic one).


Best regards.

mercoledì 23 giugno 2010

Viper MK II is done

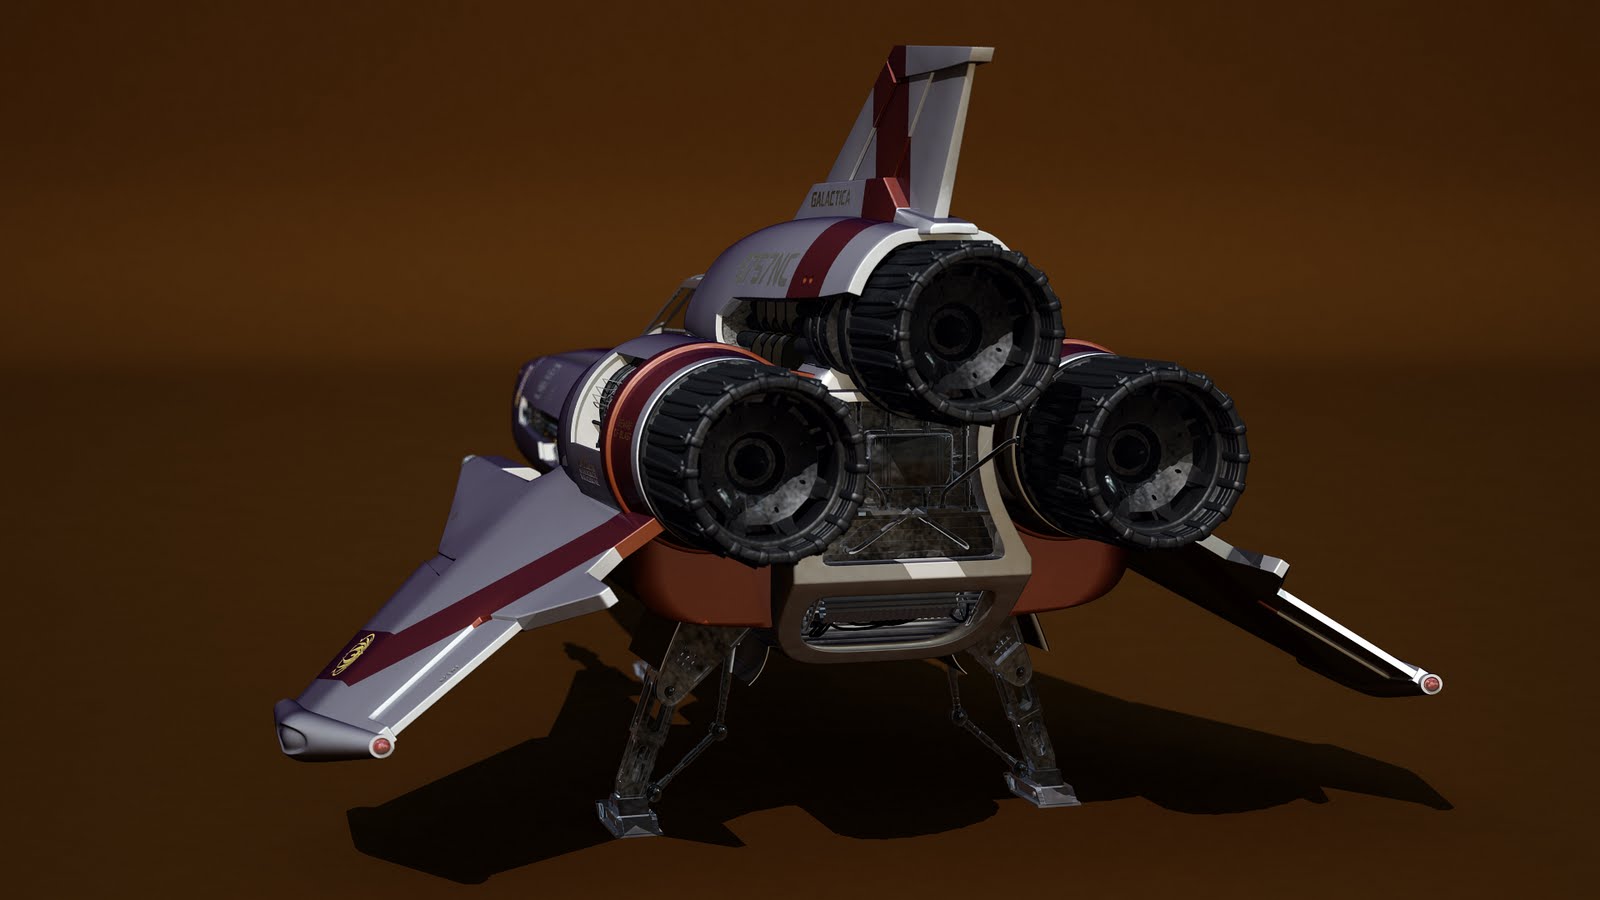
After the Cylon Centurion, the second homage to Battlestar Galactica is done. Viper Mark II is finally over: it is "the Colonial Fleet's primary space superiority fighter / attack craft during the initial Cylon War. 40 years later, they are used by Galactica to effectively combat the Cylons and their more advanced fighters  during the exodus from the Twelve Colonies".


The model is highly detailed and was totally redesigned: browsing the internet, specifically flickr, I found out these terrific photos of the original Starbuck's viper. aharvey2k's hi-res photos were a great start to understand and model all of the details and to extrapolate textures and the original font. I used Maya 2011 Hotfix 2 to model the Viper and Mental Ray to generate some test images:


As for the shaders, I used mi_car_paint_phen to simulate the unique characteristics of a mild car paint. I decreased the weight for the primary specular color and  modified the parameters for the flakes to match the aharvey2k's  photos. A mia_exposure_photographic was plugged into the MR lens shader slot of the camera. This shader is a tone mapper that converts actual pixel luminances (in candela per square meter) into image pixels as seen by a camera, applying camera-related parameters (such as f-stops and shutter times) for the exposure, as well as applying tone mapping that emulates film and camera effects. mib_blackbody light shaders were connected to the color parameters of the light shaders. I used a light probe image to illuminate the viper with measurements of real light. Below a couple of quick render tests.


I made an attempt to plug layered textures into dirt_color and dirt_weight to cover the underlaying paint and clearcoat layers in order to to get variations in the dirt across the surface. The dirt texture was painted over the UV map in Photoshop. The focal length is obviouslly wrong but this attempt helps me to notify some problem: probably I have to decrease the reflections and, in any case, the image should be modified into a compositing package.


Last, but not  least, homage will be the Cylon Raider.

Best regards.

giovedì 17 giugno 2010

QWidget: Cannot create a QWidget // Maya exited with status 1

Yesterday I've seen this error, for the first time, using batch rendering with Mental Ray. The problem was a plug-in (Maxwell Render plug-in for Maya 2011) never used in my scene but oddly loaded opening the file. The plug-in could not be unloaded because of a reference to maxwellpreviewdata. If I "forced" Maya to unload the plug-in, I got an error that stated:

Plug- in cannot be unloaded because it defines a MPxData derived type that is still in use.

Uninstalling the plug-in is the easiest thing to do, it's a temporary solution that fixes the problem, allowing Mental Ray to work fine again.
As a matter of fact, if I reinstalled the plug-in, the problem came up again.
Next I tried to delete unknown and locked nodes, running the MEL commands:
  1. lockNode -lock off `ls -type unknown`;
  2. delete `ls -type unknown`;
to clean up the file but it didn't work, Maxwell Render Plug-in was loaded again opening the scene.
The last step I made was a "brute force attack" to the scene not to waste my time.
I saved the scene as Maya Ascii file, opened it with Wordpad, deleted the line:

requires "Maxwell Render 2.0.39"

and saved the ascii file.

It worked, the plug-in isn't loaded opening the file and Mental Ray can melt again my cpu. This solution is very rough and I'd like to find out a more elegant fix.
Anyway I hope to be helpful.

Best regards.