Visualizzazione post con etichetta Render. Mostra tutti i post

mercoledì 23 giugno 2010

Viper MK II is done

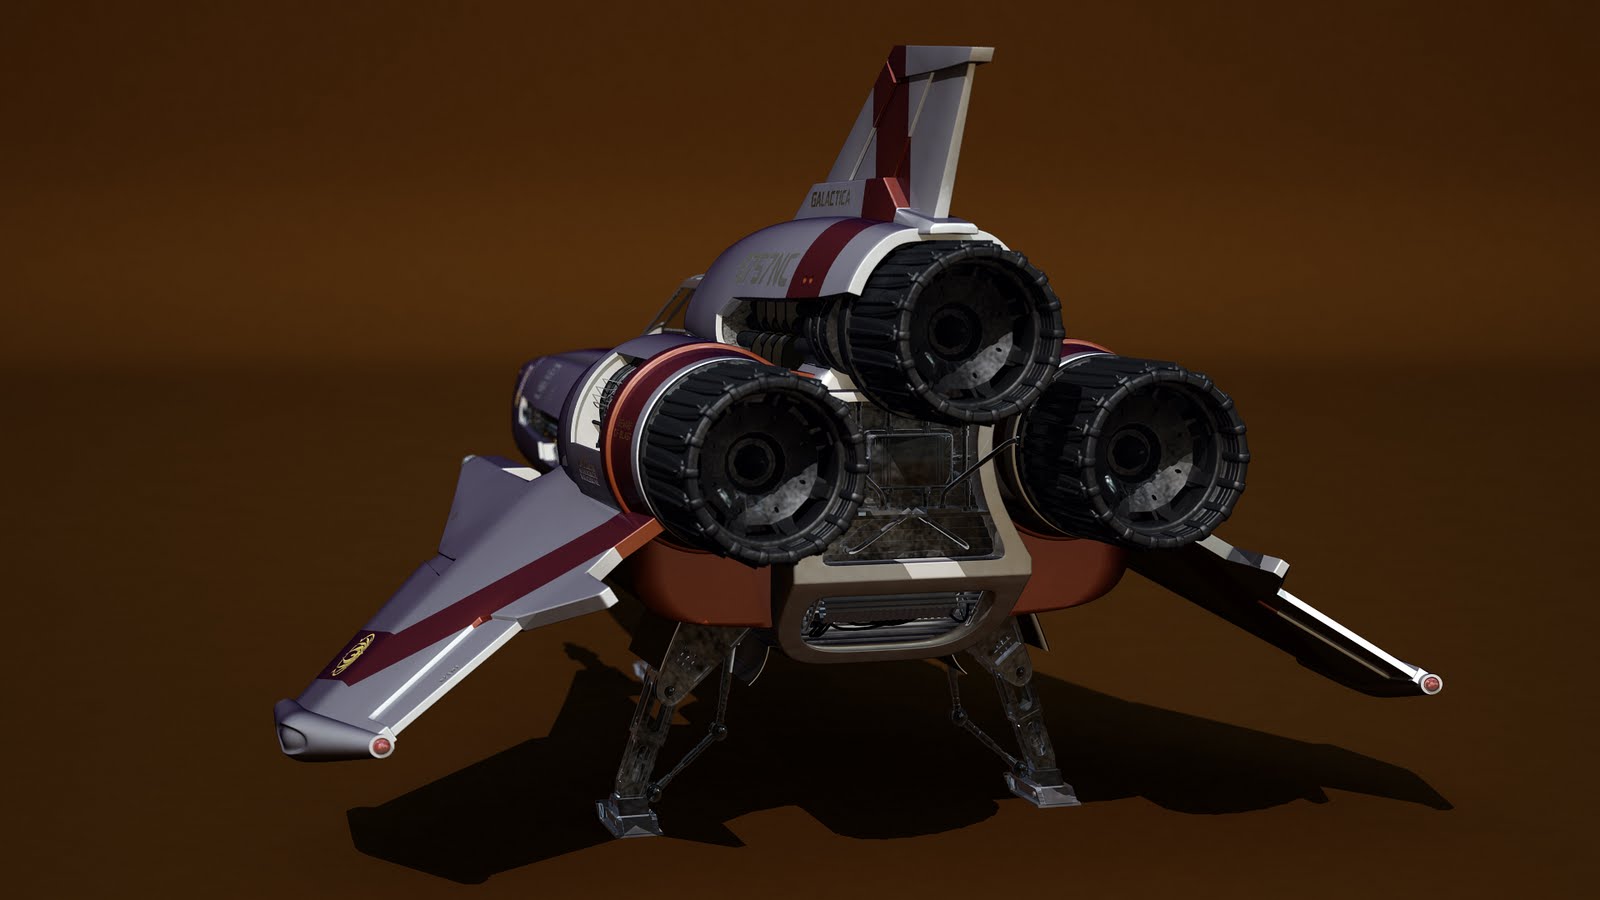
After the Cylon Centurion, the second homage to Battlestar Galactica is done. Viper Mark II is finally over: it is "the Colonial Fleet's primary space superiority fighter / attack craft during the initial Cylon War. 40 years later, they are used by Galactica to effectively combat the Cylons and their more advanced fighters  during the exodus from the Twelve Colonies".


The model is highly detailed and was totally redesigned: browsing the internet, specifically flickr, I found out these terrific photos of the original Starbuck's viper. aharvey2k's hi-res photos were a great start to understand and model all of the details and to extrapolate textures and the original font. I used Maya 2011 Hotfix 2 to model the Viper and Mental Ray to generate some test images:


As for the shaders, I used mi_car_paint_phen to simulate the unique characteristics of a mild car paint. I decreased the weight for the primary specular color and  modified the parameters for the flakes to match the aharvey2k's  photos. A mia_exposure_photographic was plugged into the MR lens shader slot of the camera. This shader is a tone mapper that converts actual pixel luminances (in candela per square meter) into image pixels as seen by a camera, applying camera-related parameters (such as f-stops and shutter times) for the exposure, as well as applying tone mapping that emulates film and camera effects. mib_blackbody light shaders were connected to the color parameters of the light shaders. I used a light probe image to illuminate the viper with measurements of real light. Below a couple of quick render tests.


I made an attempt to plug layered textures into dirt_color and dirt_weight to cover the underlaying paint and clearcoat layers in order to to get variations in the dirt across the surface. The dirt texture was painted over the UV map in Photoshop. The focal length is obviouslly wrong but this attempt helps me to notify some problem: probably I have to decrease the reflections and, in any case, the image should be modified into a compositing package.


Last, but not  least, homage will be the Cylon Raider.

Best regards.

giovedì 6 maggio 2010

Cylon Centurion - Final render

It's time to complete my homage to Battlestar Galactica, one of my favorite TV shows. The first model to render is the fabulous Cylon Centurion, "a fully armored, metallic automaton that functions as the basic foot-soldier of the Cylon ground forces".
I used Autodesk Maya 2011 to model and render  my centurion. The Cylon soldier has got a lot of bevelled and rounded surfaces, so I decided to use Subdivision Surfaces when possible.
Finding good photos and references was the most difficult part of this process. I found out this site and it was a good starting point for the body. Unfortunately, the head and some details are barely visible, but I found out 
two more photos for the head.


Due to the low-quality photos, the head was quite complicated but the images I found in a second moment were good and the modeling part turned into a great amusement. I used a low poly sphere to start sculpting the head. On the left there's the original model, on the right my low poly cage.


I converted the low poly cage into a subdivision surface to smooth the head. After conversion, all edges were creased: the result is very good for me.
Only the head was modeled with polygons, all other parts were approximated  using subdiv surfaces.


Once the model was finished, I had to assign good materials to subdiv surfaces. I used a metal material created by Jeff Patton, a great CG artist, for all metallic parts. I downloaded a good, free angular map to lluminate my model with measurements of real light.


Test above is really good for me but I'd like to add my centurion to a photo representing a real scenario.


With Final Gather turned on, rendering took 1 hour on my computer but I like very much the result: the centurion is hunting rebels in a Caprica's wood.
The next model to render will be my new Viper MK II.

martedì 12 gennaio 2010

Documenting architectural facades with a photogrammetry software


The image on the left is a mosaic of several photos traced in AutoCAD and representing the architectural facade of San Macuto in Rome. In this case my CAD drawing is superimposed on the mosaic.
All photographs I took contained perspective distortions which were eliminated with a freeware photogrammetry software called RDF. Then all images were composited in Photoshop and, as said before, traced in AutoCAD.
I could take the entire facade of the church in just one photograph but I needed all architectural details. It's almost impossible to do a work like this with a single image.
Precision mosaicing would require a dedicated software solution because Photoshop leaves us the task of mounting all photos together as best we can. Anyway the result is pretty cool and suggestive. Some programs offer an automatic vectorialization of a photo but I often don't like the results.
RDF uses a method called photogrammetry with measurements: the image is straightened up through measurements taken on the object of photogrammetry. So we need at least two measures (one horizontal and one vertical).
The programs offers two ways to fix the perspective distortion: analytic and geometric. I prefer the second way because it's faster and more intituitive, so I realised a short video tutorial to explain the geometric mode to straighten up photos with RDF. 
English and Italian subtitles are available for this video. Locate the logo in the lower right corner and select the subtitles you prefer.


It's also possible to use this method to create perfect textures for 3D models.
The image on the left is a render of a 3D model (Concattedrale di Taranto by Gio Ponti) I made some years ago.
All textures were created straightening up several photos with RDF. If the model has a good UV Map  with the right aspect ratio, it's pretty simple to use photographs as textures.
In this case the result is often very realistic.