domenica 5 settembre 2010

40tude Dialog - Write access error

40tude Dialog worked fine on my Windows 7 x64 until today: if I run 40tude, this message box appears:

You don't have necessary write access to "C:\Program Files (x86)\40tude Dialog"

We can fix the error if we change the compatibility mode:
  1. Right click on the 40tude' shortcut or on dialog.exe
  2. Click on Properties
  3. Check the Run this program in compatibility mode for checkbox
  4. Select Windows XP (Service Pack 3) and click Apply
Now 40tude should run again (in my case this fix worked). We can quit the program and disable the compatibility mode.

Best regards.

sabato 4 settembre 2010

IR receivers (Animax)

I was looking around in an electronic and hardware store a couple of weeks ago and I saw two left IR receivers (a TSOP1730 and a TSOP1333). I knew these electronic components are quite difficult to find, at least in the town where I use to spend my holidays, so I bought them to build a couple of IR receivers to remote control an old TV card and MPlayer (and Totem, vlc, tvtime...).
I've never soldered components onto a stripboard in my life but the hardware layout is very simple and I have fun building things on my own.
Modern computers do not include RS232 serial ports anymore but in my holidays house I have this prehistoric PC with two serial ports (COM1 and COM2) so...why not?
I used the following components for the first receiver:
  1. A stripboard.
  2. Vishay Telefunken TSOP1730 (the Photo Module for PCM Remote Control Systems receiver - carrier frequency = 30 kHz).
  3. A positive voltage regulator L7805CV (output voltage of 5 V) .
  4. One female serial connector RS232.
  5. Switching diode 1N4148 (cathode --> black band).
  6. 4.7 uF Electrolytic Capacitor (cathode is the shorter pin).
  7. One 4.7K Ohm resistor (no matter what direction of assembly we'll use).
There's plenty of tutorials over the internet and I won't write the nth (obsolete) howto but a couple of things I deducted building my own receivers:


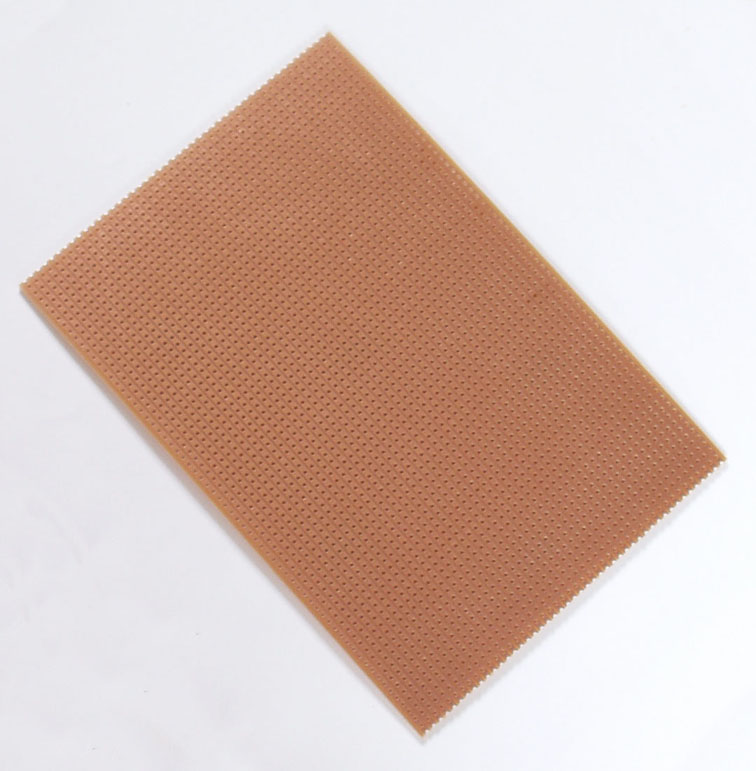
The assembly is very easy: we can insert the pieces into the stripboard and realize all of the connections between the components melting the resin cored electrical solder (because it's a conductor). The bottom of the stripboard should look like the image on the right (image taken from http://usbirboy.sourceforge.net/). We don't need to realize a professional soldering but we have to avoid to cross the connections, so a minimal project is required.

The components are very small and delicate. It's very easy to break them, so we need to insert the stripboard into something resistant. I used an old mouse to contain the stripboard (my beautiful cat jumps on my desk continually). This kind of "case" could limit the reception and the project should take it into account. My first receiver works fine with all of my remote controls: I'm using a Philips SRP4004/87 because it has dedicated buttons for DVD, VCR, TV and STB.

I'm building another, more complicated, receiver into the box of a serial connector RS232. The space is minimal and it's very hard to keep the components separated. And I don't know if the TSOP1333 will work. Anyway I'd like to build a self-made USB receiver. I will try the complete kit in the fanshop as soon as possible, assembling it should be very funny.


It's very easy to set up the remote control on Ubuntu: type these commands in a terminal:


 # The serial port is configured as COM, we have to disable it with setserial
 stefano@SERVER:~$ sudo apt-get install setserial
 # We can disable permanently the serial port as uart
 # Let's choose "manual"
 stefano@SERVER:~$ sudo dpkg-reconfigure setserial

 # We have to modify/create the file autoserial.conf
 # and insert the line /dev/ttyS0 uart none
 stefano@SERVER:~$ sudo gedit /var/lib/setserial/autoserial.conf

 # We have to copy autoserial.conf to /etc/serial.conf
 stefano@SERVER:~$ sudo cp /var/lib/setserial/autoserial.conf /etc/serial.conf

 # Now we can install Lirc
 stefano@SERVER:~$ sudo apt-get install lirc lirc-modules-source module-assistant

 # and set up it choosing "custom" for the remote control,
 # none for the transmitter and /dev/ttyS0 for the serial port
 stefano@SERVER:~$ sudo dpkg-reconfigure lirc-modules-source

 # Now we can set up the remote control
 stefano@SERVER:~$ sudo /etc/init.d/lirc stop
 stefano@SERVER:~$ sudo irrecord -f -d /dev/lirc0 lircd.conf
 stefano@SERVER:~$ sudo move lircd.conf /etc/lirc
 stefano@SERVER:~$ sudo /etc/init.d/lirc restart

My /etc/lirc/hardware.conf:


# /etc/lirc/hardware.conf
#
#Chosen Remote Control
REMOTE="Custom"
REMOTE_MODULES="lirc_dev lirc_serial"
REMOTE_DRIVER=""
REMOTE_DEVICE="/dev/lirc0"
REMOTE_SOCKET=""
REMOTE_LIRCD_CONF=""
REMOTE_LIRCD_ARGS=""

#Chosen IR Transmitter
TRANSMITTER="None"
TRANSMITTER_MODULES=""
TRANSMITTER_DRIVER=""
TRANSMITTER_DEVICE=""
TRANSMITTER_SOCKET=""
TRANSMITTER_LIRCD_CONF=""
TRANSMITTER_LIRCD_ARGS=""

#Enable lircd
START_LIRCD="true"

#Don't start lircmd even if there seems to be a good config file
#START_LIRCMD="false"

#Try to load appropriate kernel modules
LOAD_MODULES="true"

# Default configuration files for your hardware if any
LIRCMD_CONF="/etc/lirc/lircd.conf"

#Forcing noninteractive reconfiguration
#If lirc is to be reconfigured by an external application
#that doesn't have a debconf frontend available, the noninteractive
#frontend can be invoked and set to parse REMOTE and TRANSMITTER
#It will then populate all other variables without any user input
#If you would like to configure lirc via standard methods, be sure
#to leave this set to "false"
FORCE_NONINTERACTIVE_RECONFIGURATION="false"
START_LIRCMD=""

and my /etc/lirc/lircd.conf:


# Please make this file available to others
# by sending it to
#
# this config file was automatically generated
# using lirc-0.8.6(default) on Mon Aug 23 23:59:44 2010
#
# contributed by Stefano Bolli
#
# brand: Philips
# model no. of remote control: SRP4004/87
# devices being controlled by this remote:
#

begin remote

name Philips_SRP4004/87
flags RAW_CODES|CONST_LENGTH
eps 30
aeps 100

gap 107808

begin raw_codes

name KEY_TV
2749 825 501 846 469 430
505 393 1403 1294 538 358
506 393 506 393 506 390
508 391 474 427 469 430
472 425 471 427 954 396
471 425 506 844 503 395
506 393 503

name KEY_POWER
2718 858 502 844 503 395
502 397 472 875 955 390
506 395 506 393 501 423
476 423 480 393 538 359
503 398 501 396 505 393
506 393 538 361 919 426
471 878 471 455 446

name KEY_QUESTION
2717 857 506 843 504 395
538 359 1436 1260 501 398
572 320 475 430 469 428
503 395 469 431 503 395
954 391 506 843 504 395
954 393 506 843 504 393
506

name KEY_MENU
2751 825 506 843 504 393
501 395 506 844 988 359
471 430 501 395 506 393
471 428 503 395 504 395
472 425 508 393 954 841
920 876 954 846 501 395
506

name KEY_INFO
2749 825 506 843 503 394
503 396 1370 1326 469 430
503 393 504 396 505 395
501 394 508 393 503 393
506 393 506 393 503 421
480 393 987 386 478 395
504 423 476

name KEY_EXIT
2751 822 503 844 471 428
505 393 504 846 954 390
506 399 500 395 502 397
467 430 471 443 486 395
506 395 472 427 918 913
471 391 505 393 508 394
535 361 954

name KEY_LEFT
2718 860 504 866 476 398
503 393 1402 1294 472 425
542 356 508 393 472 425
503 396 471 428 505 394
471 427 954 844 919 426
505 846 952 844 537

name KEY_UP
2782 791 503 844 503 420
478 398 469 876 956 393
472 427 536 363 471 426
537 361 506 393 504 395
503 396 469 427 922 878
952 418 446 876 474 427
471 428 501

name KEY_RIGHT
2748 825 472 875 502 395
506 395 1402 1297 499 393
508 393 505 393 501 400
467 428 501 398 503 395
506 393 952 846 952 395
503 844 952 395 504

name KEY_DOWN
2748 851 514 809 469 453
478 396 469 880 917 453
446 428 471 428 469 429
504 395 504 395 471 426
503 423 478 419 928 844
920 429 501 872 512 359
922

name KEY_SELECT
2717 859 469 881 498 396
469 457 1409 1260 469 455
513 360 504 418 481 395
501 396 471 425 471 455
446 453 895 878 951 396
468 428 471 878 539 358
473

name KEY_RED
2716 860 468 876 504 420
479 395 469 878 952 397
469 430 469 428 468 430
471 428 506 393 469 430
471 425 471 455 892 433
469 878 951 419 446 880
917

name KEY_GREEN
2718 858 503 846 503 393
504 395 1403 1293 472 427
469 430 469 428 471 427
538 361 506 391 505 393
541 358 922 427 504 844
954 393 471 428 503 846
501

name KEY_YELLOW
2714 860 469 903 444 455
444 453 448 876 919 453
513 388 478 419 445 426
471 430 471 453 441 458
443 430 469 455 925 420
446 903 927 420 446 428
501 423 444

name KEY_BLUE
2714 859 469 878 504 395
499 398 1370 1352 510 361
503 396 503 398 501 395
538 362 503 395 538 358
541 361 919 428 505 391
474 876 503 395 469 428
473 425 506

name KEY_VOLUMEUP
2716 858 503 846 501 395
501 396 506 843 920 427
538 361 474 423 508 393
503 393 506 393 506 395
501 396 503 398 503 391
540 361 954 841 506 395
538 357 471 457 442

name KEY_VOLUMEDOWN
2718 859 501 844 505 393
470 429 1402 1295 471 425
503 398 504 395 501 396
471 427 469 430 469 428
471 432 469 423 508 395
915 881 503 394 473 453
960

name KEY_MUTE
2750 825 506 843 502 395
503 396 505 842 956 394
503 393 505 393 472 427
504 393 474 427 471 425
506 393 471 430 501 396
538 363 469 425 956 396
503 844 919

name KEY_BACK
2716 859 469 879 505 393
501 398 1400 1294 506 393
471 428 538 361 503 391
471 430 506 393 471 425
472 427 538 361 506 395
469 430 917 881 951 844
503

name KEY_CHANNELUP
2716 882 446 904 443 455
444 430 538 834 894 453
446 453 444 453 446 427
472 455 510 386 444 455
444 455 446 453 478 420
895 903 444 430 466 456
475 423 444 455 444

name KEY_CHANNELDOWN
2751 824 504 869 480 419
478 395 1400 1296 469 428
471 428 469 427 471 428
472 427 506 418 446 453
478 397 502 398 951 844
501 395 504 397 470 427
952

name KEY_PAGEDOWN
321

name KEY_PAGEUP
2752 827 501 846 467 430
503 395 1403 1319 476 421
480 418 481 395 469 428
471 430 467 429 471 426
471 430 469 452 481 421
441 457 927 418 515 359
503 396 535

name KEY_REWIND
2749 851 475 874 443 430
504 420 444 878 920 452
446 453 444 455 444 455
446 427 469 453 478 421
444 455 894 453 478 395
469 904 929 868 961 386
444

name KEY_PLAY
2753 825 504 843 504 420
478 396 1402 1290 505 421
480 396 501 395 504 395
504 393 505 393 506 396
951 396 503 844 951 846
501 396 954 395 504

name KEY_FASTFORWARD
2720 854 472 906 442 456
443 453 448 874 922 453
443 455 444 453 448 453
444 452 446 453 446 455
444 453 894 453 446 452
446 904 892 876 924 873
471

name KEY_STOP
2713 888 478 869 443 428
503 398 1368 1326 536 363
501 396 507 416 481 393
503 396 506 390 506 393
922 880 502 420 444 453
926 398 437 487 478 393
471

name KEY_RECORD
1886 788 993 804 991 807
989 808 991 1703 992 806
991 807 991 804 1892 1706
988 807 1887

name KEY_PAUSE
2750 825 503 844 504 393
540 358 508 842 954 393
505 391 508 391 540 359
506 393 508 391 505 393
506 393 956 842 506 393
954 841 508 391 538 360
538 361 504

name KEY_1
2750 851 443 904 446 450
481 420 1378 1289 506 420
478 421 478 421 478 418
481 420 479 418 479 420
478 423 478 418 478 421
446 451 478 423 443 456
443 453 931

name KEY_2
2752 851 446 876 471 427
506 393 469 878 918 429
471 428 471 428 503 396
503 393 506 393 540 361
502 395 471 428 471 427
504 395 471 453 478 393
506 393 956 841 472

name KEY_3
2716 859 472 875 538 361
504 395 1368 1326 501 396
505 396 572 324 504 393
540 361 505 391 506 396
470 428 503 394 505 396
505 393 470 427 471 428
956 393 501

name KEY_4
2786 789 542 805 540 359
540 356 545 804 957 391
540 358 543 354 545 356
508 389 542 356 543 359
540 356 543 356 510 389
540 358 541 358 541 356
991 807 542 356 541

name KEY_5
2750 823 471 878 499 398
503 395 1403 1317 480 396
501 395 506 418 547 324
472 432 467 429 504 393
471 428 508 391 506 392
501 423 481 393 954 844
917

name KEY_6
2712 860 503 844 471 430
503 396 503 844 919 426
473 428 503 395 472 425
469 430 505 391 474 427
506 393 538 361 503 396
468 430 502 395 506 393
921 430 504 841 501

name KEY_7
2752 823 469 903 446 455
444 453 1342 1327 471 455
444 453 448 450 446 455
444 453 444 455 443 456
446 452 444 453 446 453
444 457 444 452 895 425
540 361 472

name KEY_8
2784 791 501 846 501 398
503 393 504 871 894 428
535 363 504 393 506 420
513 361 471 451 446 427
506 393 469 430 506 393
471 428 468 428 956 842
469 455 478 395 539

name KEY_9
2719 857 502 848 501 395
504 397 1401 1294 501 395
471 428 504 390 511 393
471 425 508 394 503 395
502 395 469 432 501 393
506 395 955 841 471 430
954

name KEY_TEXT
2782 791 503 842 507 391
508 393 504 843 956 391
506 393 510 389 503 393
508 393 506 393 504 393
508 391 956 393 538 358
541 358 508 842 954 841
956

name KEY_0
2751 825 504 843 471 428
506 390 1373 1324 471 428
505 393 474 425 472 427
504 395 469 430 538 358
504 395 506 393 474 425
471 428 471 425 508 393
506 393 469 428 505

name KEY_HELP
2752 850 479 868 479 420
478 419 480 869 927 420
479 420 478 421 478 421
478 419 478 420 481 418
478 421 929 418 481 869
928 419 480 869 929 393
501

end raw_codes

end remote

I used mythbuntu-lirc-generator for initially setting up an ordinary Ubuntu system's remote control. Below a lircrc file generated by Mythbuntu Lirc Generator to control Totem.


# LIRCRC Auto Generated by Mythbuntu Lirc Generator
# Author(s): Mario Limonciello, Nick Fox, John Baab
# Created for use with Mythbuntu
begin
remote = Philips_SRP4004/87
prog = totem
button = KEY_POWER
config = quit
repeat = 0
delay = 0
end

begin
remote = Philips_SRP4004/87
prog = totem
button = KEY_MENU
config = menu
repeat = 0
delay = 0
end

begin
remote = Philips_SRP4004/87
prog = totem
button = KEY_INFO
config = show_playing
repeat = 0
delay = 0
end

begin
remote = Philips_SRP4004/87
prog = totem
button = KEY_EXIT
config = quit
repeat = 0
delay = 0
end

begin
remote = Philips_SRP4004/87
prog = totem
button = KEY_LEFT
config = left
repeat = 0
delay = 0
end

begin
remote = Philips_SRP4004/87
prog = totem
button = KEY_UP
config = up
repeat = 0
delay = 0
end

begin
remote = Philips_SRP4004/87
prog = totem
button = KEY_RIGHT
config = right
repeat = 0
delay = 0
end

begin
remote = Philips_SRP4004/87
prog = totem
button = KEY_DOWN
config = down
repeat = 0
delay = 0
end

begin
remote = Philips_SRP4004/87
prog = totem
button = KEY_VOLUMEUP
config = volume_up
repeat = 0
delay = 0
end

begin
remote = Philips_SRP4004/87
prog = totem
button = KEY_VOLUMEDOWN
config = volume_down
repeat = 0
delay = 0
end

begin
remote = Philips_SRP4004/87
prog = totem
button = KEY_MUTE
config = mute
repeat = 0
delay = 0
end

begin
remote = Philips_SRP4004/87
prog = totem
button = KEY_BACK
config = quit
repeat = 0
delay = 0
end

begin
remote = Philips_SRP4004/87
prog = totem
button = KEY_REWIND
config = seek_backward
repeat = 0
delay = 0
end

begin
remote = Philips_SRP4004/87
prog = totem
button = KEY_PLAY
config = play_pause
repeat = 0
delay = 0
end

begin
remote = Philips_SRP4004/87
prog = totem
button = KEY_FASTFORWARD
config = seek_forward
repeat = 0
delay = 0
end

begin
remote = Philips_SRP4004/87
prog = totem
button = KEY_PAUSE
config = pause
repeat = 0
delay = 0
end

begin
remote = Philips_SRP4004/87
prog = totem
button = KEY_SELECT
config = select
repeat = 0
delay = 0
end

begin
remote = Philips_SRP4004/87
prog = totem
button = KEY_STOP
config = stop
repeat = 0
delay = 0
end

begin
remote = Philips_SRP4004/87
prog = totem
button = KEY_BLUE
config = fullscreen
repeat = 0
delay = 0
end

On Windows I use Girder . WinLirc has some problem with my remote control. The latest free release of Girder (3.29b?) works fine with my Pinnacle PCTV and vlc 0.86 (we can't use the latest versions because Girder has problems with the QT libraries).

Best regards.

sabato 7 agosto 2010

Problem with Google Images and Firefox 3.6.8

EDIT: Solution here.

In my holidays house I cannot search Google Images. Recently Google changed the design of its image search engine and I have been experiencing a problem with Firefox and other browsers on Ubuntu and Windows.
If I try to search Google Images, Firefox hangs loading the results, no image is shown at all and Google related sites are unreachable for a little while (it's still possible to browse other sites) :


I think it's impossible to revert Google Images to its old design, so I  thought to use Google Mobile to search images because I can browse it with my smartphone without problems.
It's quite easy to use Google Mobile to search images: we can use a string formatted in this way:

"http://www.google.com/m/search?site=images&q=" + search terms

for example:

http://www.google.com/m/search?site=images&q=firefox+ubuntu

I wrote a simple search plugin for the Firefox Search bar to search images with Google Mobile.

Copy this text:


<OpenSearchDescription xmlns="http://a9.com/-/spec/opensearch/1.1/"
xmlns:moz="http://www.mozilla.org/2006/browser/search/">
<ShortName>Google Mobile Images</ShortName>
<Description>Search images with Google Mobile</Description>
<InputEncoding>inputEncoding</InputEncoding>
<Image width="16" height="16" type="image/x-icon">data:image/x-icon;base64,iVBORw0KGgoAAAANSUhEUgAAABAAAAAQCAYAAAAf8/9hAAAAAXNSR0IArs4c6QAAAARnQU1BAACxjwv8YQUAAAAgY0hSTQAAeiYAAICEAAD6AAAAgOgAAHUwAADqYAAAOpgAABdwnLpRPAAAA09JREFUOE8lk21sFFUYhd+ZKUaaStsfmBhAG6OIYGNM0G671CrExjYaMAhYEyAR5Y/48csPXI20bLUoUCxWWvxszEqRYFttYYMWFdBKmhaIRW2lX6JUdmm722ZhO7vz+M7448y9c+ee8573zL0iItgp6B4YJW9jiIxHPqP60FnSpEjGJjhRUkSfIcyYJmndmxaThL6P69zlSsoGB1hVdRRZF8bc1M2cp77lz3/i+iFF4tc+LmVlemTHsEgr2RWISgbDpgooF9u2uW1LB7KpC9nci1T8QNVX5zxl1WC4tJSkGKQsIWkYTIpFREWGXAdOWhV0kz/Qibn+J8zNXZhPnmTdrh5X2tXnwupVTGtFlJRW8pSOfyu537RcB65Cmsrmc8jqMBlPn8Z84jsqart0VS1cg5/vXMSPN11H68JcOvJy6c6ZxYjad7ORgZErXgZjsQSLtrQjjx9jzvow4d6L3npD634WvJiHvF+AVV+M1PmZXXMfRc/ks2NJNnLHhk841HleTThMxJN8enyQ/tErXvXg0Qak8i6sRj/WviKkvkBRiLFH53UlGG8tR+auPUDOyg9Z/kKI7U2d/6emvR/v/wXz5VuQ/fciDUpsLMDYu8yD7PZhvFOsAverg4om5q/5nOvLPyb34X0MjcVwHIeR6EUWNj6G7M3H/KBQ4de5D/M9P8buYkwVkBofcmvZLnwbPmLtG208X/s9vf3jnn1Hn5F4hNIDz2LszFfrWln796ACskOxXRE6dobIuJc3M5N9jF1oYbC3nqtTl71fOKMnrSz0nIosVrJWrPVr9ULkbRUMKty/OPXvGXpafAy1ZPJXuzB62OR882Ji0T+8TH4bG+aG6hIlF2K9uwyzRisHtf9timv2NN2hAia+0aN6ysQ+kUmiczaXDwoDLeVeHm6ut+9Zoz0vRXZqC9XFzNq2AuN1FYhHB/m9aR5XwznEwlnE27OZbMtm+ut5XPrybkhOkbAdFgTLlahhBh/UUV28+QDymjqxUw5DRzYS/SKLydYbibXN9cixgzczfjLgZdN8+gjWS/dgVOl5qNRW3MpbFa+ucG+kXufpKJFTASY6VhJrfUjHR0n01JG0E5wdGWT+K2VKWIoZUHLArazhbVUnyv0Pap2Kdp9xgc4AAAAASUVORK5CYII=</Image>
<Url type="text/html" method="GET" template="http://www.google.com/m/search?site=images&amp;q={searchTerms}" />
</OpenSearchDescription>

and paste into your preferred text editor, save as gm.xml in

~/.mozilla/firefox/xxxxxxxx.default/searchplugins

Restart Firefox and the plugin will be added to pre-loaded search engines:


It's possible to use it on windows too (Shortcut Win + R --> %appdata%\mozilla\firefox\profiles).

A best solution comes from my brother, Massimo: It's possible to bypass the problem using an anonymous web proxy like anonymouse.org. A bookmark with a link like this:

http://anonymouse.org/cgi-bin/anon-www.cgi/http://www.google.com/imghp

speeds up the process and works fine.

Best regards

venerdì 6 agosto 2010

Microsoft Wireless Comfort Keyboard 1.0a on Ubuntu Lucid Lynx 10.04

Many of the multimedia keys of my Microsoft Wireless Comfort Keyboard 1.0a are not predefined on Ubuntu Lucid Lynx 10.04


Unfortunately  KeyTouch doesn't work for me. Fortunately there are a number of good tutorials to fix this problem. I followed this one:


and it's a very good howto that I don't want to copy here. I want to report here my own parameters to fully take advantage of my keyboard.
Pressing  my multimedia keys one by one and using sudo dmesg -c in a gnome-terminal, I discovered the scancodes from outputs like this:

atkbd.c: Unknown key pressed (translated set 2, code 0xe002 on isa0060/serio0).
atkbd.c: Use 'setkeycodes e002 ' to make it known.

Now, before going on, a little explanation: my keyboard has a special button, called "F Bloc" (Function blocks), to enable/disable particular functions for F1, F2...F12  keys and I want to fully take advantage of it.
Here it is, my /etc/rc.local, you can see the new functions
for F1, F2...F12  keys in case of F Bloc disabled :

#!/bin/sh -e
#
# rc.local
#
# This script is executed at the end of each multiuser runlevel.
# Make sure that the script will "exit 0" on success or any other
# value on error.
#
# In order to enable or disable this script just change the execution
# bits.
#
# By default this script does nothing

setkeycodes e00b 180 # Zoom in
setkeycodes e011 181 # Zoom out
setkeycodes e005 182 # Messenger
setkeycodes e015 183 # Calendar
setkeycodes e016 184 # Disconnect
setkeycodes e073 185 # Favorites 1
setkeycodes e074 186 # Favorites 2
setkeycodes e075 187 # Favorites 3
setkeycodes e076 188 # Favorites 4
setkeycodes e077 189 # Favorites 5
setkeycodes e078 190 # Favorites - Star
setkeycodes e03b 191 # Help  -> F1
setkeycodes e008 192 # Undo  -> F2
setkeycodes e007 193 # Redo  -> F3
setkeycodes e03e 194 # New   -> F4
setkeycodes e03f 195 # Open  -> F5
setkeycodes e040 196 # Close -> F6
setkeycodes e041 197 # Reply -> F7
setkeycodes e042 198 # Fwd   -> F8
setkeycodes e043 199 # Send  -> F9
setkeycodes e023 200 # Spell -> F10
setkeycodes e057 201 # Save  -> F11
setkeycodes e058 202 # Print -> F12
exit 0

after that, I added the missing keysyms to the right keycodes in /etc/xmodmap.conf:

clear Mod1
add Mod1 = Alt_L
clear Mod4
add Mod4 = Tab
clear Mod5
add Mod5 = Alt_R
keycode 188 = XF86ZoomIn NoSymbol XF86ZoomIn
keycode 189 = XF86ZoomOut NoSymbol XF86ZoomOut
keycode 190 = XF86Messenger NoSymbol XF86Messenger
keycode 191 = XF86Calendar NoSymbol XF86Calendar
keycode 192 = XF86LogOff NoSymbol XF86LogOff
keycode 193 = XF86Launch0 NoSymbol XF86Launch0
keycode 194 = XF86Launch1 NoSymbol XF86Launch1
keycode 195 = XF86Launch2 NoSymbol XF86Launch2
keycode 196 = XF86Launch3 NoSymbol XF86Launch3
keycode 197 = XF86Launch4 NoSymbol XF86Launch4
keycode 198 = XF86Launch5 NoSymbol XF86Launch5
keycode 199 = XF86Support NoSymbol XF86Support
keycode 200 = Undo NoSymbol Undo
keycode 201 = Redo NoSymbol Redo
keycode 202 = XF86New NoSymbol XF86New
keycode 203 = XF86Open NoSymbol XF86Open
keycode 204 = XF86Close NoSymbol XF86Close
keycode 205 = XF86Reply NoSymbol XF86Reply
keycode 206 = XF86Forward NoSymbol XF86Forward
keycode 207 = XF86Send NoSymbol XF86Send
keycode 208 = XF86Spell NoSymbol XF86Spell
keycode 209 = XF86Save NoSymbol XF86Save
keycode 210 = XF86Launch6 NoSymbol XF86Launch6

Note 1: If I put xmodmap.conf in my home directory, it doesn't work.
Note 2: I added some extra commands at the top of the file (clear ..., add ...): clear is used to remove all entries in the modifier map for the given modifier,  where valid name are: Shift, Lock, Control, Mod1, Mod2, Mod3, Mod4, and Mod5
add is a command to reassign all  keys containing the given keysyms to the indicated modifier map. 
If I don't use these commands, some functions keys (F5, F7, F8, F9) don't work as expected and gnome-keybindind-properties cannot detect them correctly.

Now I can use gnome-keybinding-properties or xbindkeys-config to bind actions to my fresh configured keys: 


I took a screenshot of xbindkeys-config to show my settings, but actually I'm using gnome-keybinding-properties because it allows me to zoom in and zoom out without extra configurations.
As for F1, F2...F12  keys in case of F Bloc disabled, they are used with an email client, according to their labels and Microsoft docs, so I thought to use xdotool to send predefined and existing shortcuts to Evolution.
I'm writing a script to handle these shortcuts. It's possible to pass arguments to the script in this way: "myEvolutionShortcuts new" to start a new message, "myEvolutionShortcuts reply", "myEvolutionShortcuts send" and so on:

#!/bin/sh

# Search and store Evolution - Mail window id
myEvolutionID=`xdotool search --title "In arrivo"`
# Search and store Evolution - Compose message window id
myComposeMessageID=`xdotool search --title "Componi messaggio"`

case $1 in

# New message
new)
sleep .3
xdotool windowactivate $myEvolutionID
xdotool windowfocus $myEvolutionID
xdotool key "Shift+Control+M" ;;

# Open message
open)
sleep .3
xdotool windowactivate $myEvolutionID
xdotool windowfocus $myEvolutionID
xdotool key "Control+O" ;;

# Close Evolution
close)
sleep .3
xdotool windowactivate $myEvolutionID
xdotool windowfocus $myEvolutionID
xdotool key "Control+W" ;;

# Reply message
reply)
sleep .3
xdotool windowactivate $myEvolutionID
xdotool windowfocus $myEvolutionID
xdotool key "Control+R" ;;

# Forward message
forward)
sleep .3
xdotool windowactivate $myEvolutionID
xdotool windowfocus $myEvolutionID
xdotool key "Control+F" ;;

# Send message
send)
sleep .3
xdotool windowactivate $myComposeMessageID
xdotool windowfocus $myComposeMessageID
xdotool key "Control+F" ;;

# Spell check
abc)
sleep .3
xdotool windowactivate $myComposeMessageID
xdotool windowfocus $myComposeMessageID
xdotool key "F7" ;;

# Save message
save)
sleep .3
xdotool windowactivate $myComposeMessageID
xdotool windowfocus $myComposeMessageID
xdotool key "Shift+Control+S" ;;

# Print message
print)
sleep .3
xdotool windowactivate $myComposeMessageID
xdotool windowfocus $myComposeMessageID
xdotool key "Control+P" ;;

esac

exit 0

The very early version of the script works in this way: it searches the evolution's window id using the first words of its window title, activates and gives focus to the window, finally send the window a predefined shortcut. It's easy to get info about a particular window using the xprop command.
At this time the script doesn't handle exceptions but it works fine for now and I can use all of my multimedia keys.

Best regards.

lunedì 2 agosto 2010

Getting Logitech Quickcam Express USB webcam to work with Skype on Ubuntu Lucid Lynx 10.04

As said before, this old & cheap camera is terrible. I have just installed Ubuntu 10.04 LTS on my computer in my holidays house and the camera doesn't work anymore. If I run Cheese or Skype in the way described in my previous article, this error message is displayed:

libv4l2: error turning on stream: Input/output error

Anyway, the Input/output error is suspicious: I've just thought the error is due to some unknown USB malfunction or device error. So I have unloaded gspca_STV06xx driver and unplugged the camera. After that, I have connected the camera to another USB port and here we are, now it works fine with Cheese:


and Skype (Options window):


The camera is filming the terrible panorama outside my holidays house.

We need to start Skype in the same way we did on Ubuntu 9.10.

I'd like to understand why the old USB port doesn't work after the upgrade.

Best regards.

lunedì 19 luglio 2010

Maya style navigation in Lightwave

This is just a quick reminder for me but it may be useful for other explorers. If you want to switch between different 3D applications, the hotkeys and the GUI will be the biggest obstacles you'll find. We are supposed to know 3D basic concepts, so we could use different applications for different purposes. For example, Max is very powerful to work on architectural visualization, Lightwave has a terrific, fast rendering engine,a bunch of interesting plugins and so on.
In my humble opinion, Maya style navigation is the best because it's fast, logic, easy to remember. Lightwave shortcut navigation is horrible (ie, the shortcut for the track tool changes if you are using perspective or orthographic views), Max one is uncomfortable.
Anyway, Maya style navigation in Lightwave is possible and the solution comes from the Newtek discussion forums:


"Download this little app http://www.autohotkey.com, then make a txt file with this script (written by evenflcw) in it:"

#SingleInstance force
SetTitleMatchMode, 2

/*
Lightwave Viewport Navigation - AltPlusMinus!

Alt+LMB - Rotate View (Standard LW combo)
Alt+MMB - Zoom View
Alt+RMB - Pan View
WheelUp - Zoom In
WheelDown - Zoom Out
*/

#IfWinActive LightWave ahk_class WMgrBasic

!RButton:: ;When user presses Alt+MMB,
Send ^!{LButton Down} ;Send 'Ctrl+Alt+LMB pressed'
KeyWait RButton ;Wait until MMB is released
Send ^!{LButton Up} ;Then send 'Ctrl+Alt+LMB released'
return

!MButton::
Send +!{LButton Down}
KeyWait MButton
Send +!{LButton Up}
return

*WheelUp::
Send {.}
return

*WheelDown::
Send {,}
return

#IfWinActive


"and save it with an .ahk extension. Just leave it on your desktop or somewhere handy and double click it when needed." 
If you are on Windows 7, you'll probably need to compile the script (right click on it and Compile) and run it as administrator.
As soon as possible, I'd like to create a script to assign the Maya shortcut navigation to 3Ds max.

Best regards.

venerdì 9 luglio 2010

Fantastic video by Jon Lambe

Jon Lambe is a 3D animator. He made a "short and nerdy fan film" about Battlestar Galactica. And he used my Cylon Centurion in a short sequence: the automaton appears in the sky from a Cylon mothership.


Earth from jonlambe on Vimeo.


I really like this video, the visual effects (FTL jumps, camera shake...) and the final composite.

Compliments to Jon.

Best regards.

martedì 29 giugno 2010

Possible conflict between 3ds Max 2011 and JDownloader?

I'm working on an architectural visualization with 3ds Max 2011 x64 (DirectX 9, Windows 7) and JDownloader is downloading a couple of free hdri maps.
I'm experiencing an odd bug: if JDownloader is minimized to a button on the taskbar, right-click menus don't work in Max: they flicker and then disappear. If the taskbar button is hidden, so that it only shows as an icon in the notification area, menus work fine.

Best regards.

mercoledì 23 giugno 2010

Viper MK II is done

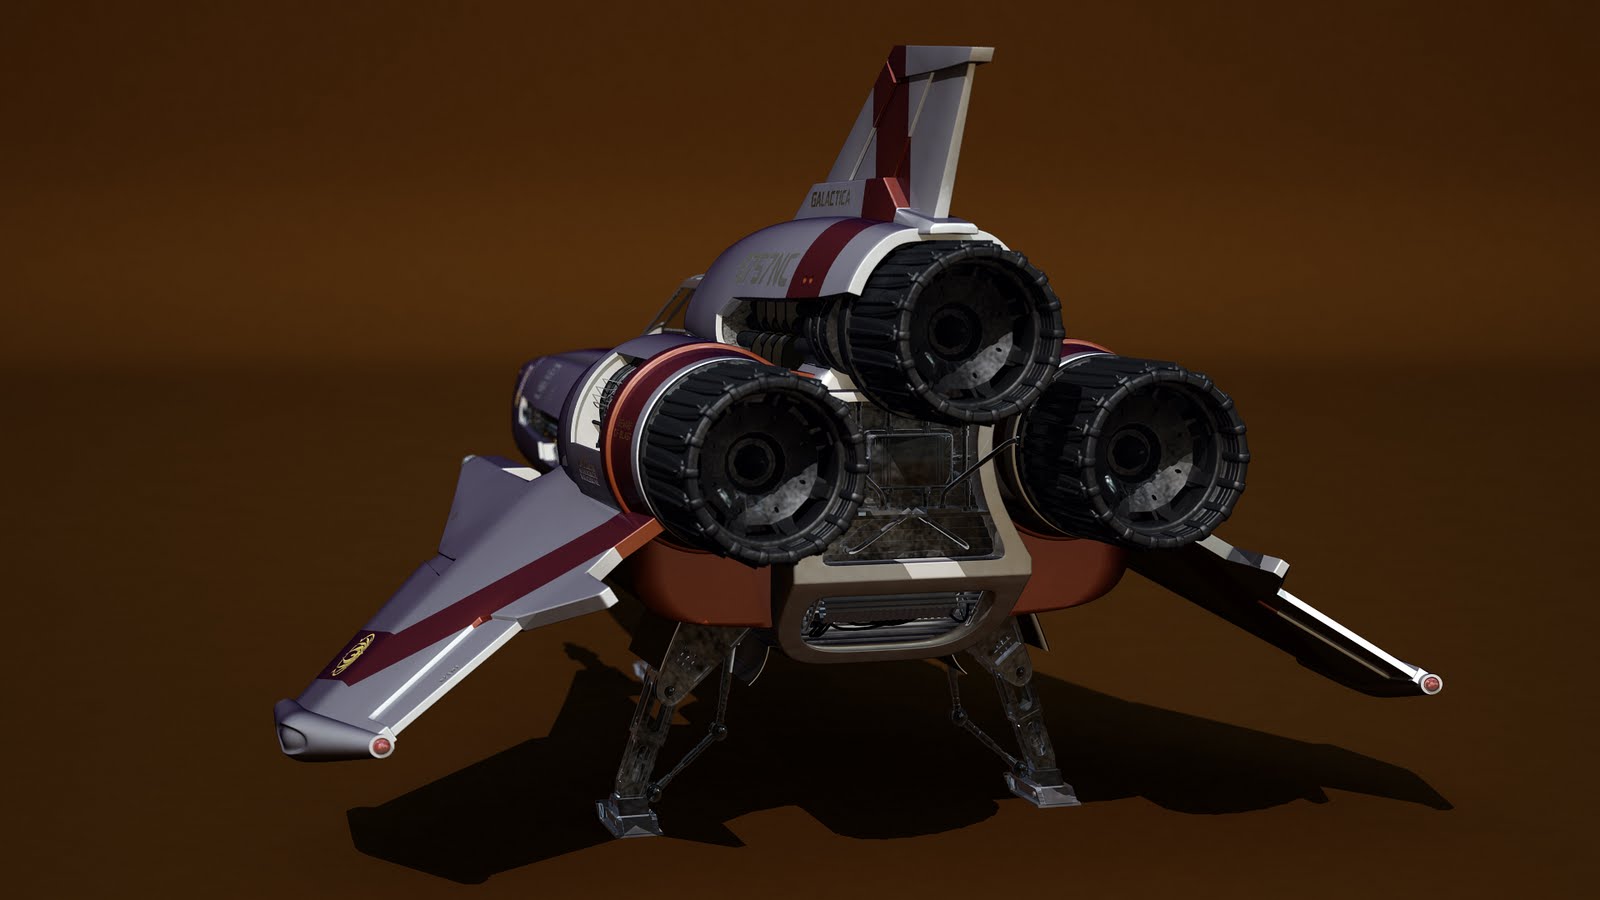
After the Cylon Centurion, the second homage to Battlestar Galactica is done. Viper Mark II is finally over: it is "the Colonial Fleet's primary space superiority fighter / attack craft during the initial Cylon War. 40 years later, they are used by Galactica to effectively combat the Cylons and their more advanced fighters  during the exodus from the Twelve Colonies".


The model is highly detailed and was totally redesigned: browsing the internet, specifically flickr, I found out these terrific photos of the original Starbuck's viper. aharvey2k's hi-res photos were a great start to understand and model all of the details and to extrapolate textures and the original font. I used Maya 2011 Hotfix 2 to model the Viper and Mental Ray to generate some test images:


As for the shaders, I used mi_car_paint_phen to simulate the unique characteristics of a mild car paint. I decreased the weight for the primary specular color and  modified the parameters for the flakes to match the aharvey2k's  photos. A mia_exposure_photographic was plugged into the MR lens shader slot of the camera. This shader is a tone mapper that converts actual pixel luminances (in candela per square meter) into image pixels as seen by a camera, applying camera-related parameters (such as f-stops and shutter times) for the exposure, as well as applying tone mapping that emulates film and camera effects. mib_blackbody light shaders were connected to the color parameters of the light shaders. I used a light probe image to illuminate the viper with measurements of real light. Below a couple of quick render tests.


I made an attempt to plug layered textures into dirt_color and dirt_weight to cover the underlaying paint and clearcoat layers in order to to get variations in the dirt across the surface. The dirt texture was painted over the UV map in Photoshop. The focal length is obviouslly wrong but this attempt helps me to notify some problem: probably I have to decrease the reflections and, in any case, the image should be modified into a compositing package.


Last, but not  least, homage will be the Cylon Raider.

Best regards.

sabato 19 giugno 2010

Fixing GRUB errors on Ubuntu Lucid Lynx 10.04

Sometimes getting GRUB to work properly on our computer can be a painful process. In my experience this difficulty often derives from the complexity of multiple hard drive system. For example, my brother has an old pc with 2 hd drives, (SATA and IDE). The SATA disk is the main bootable drive, the IDE one is used for storage purposes.
It should be easy to get GRUB to work properly on a pc with 2 drives on 2010. Well, it's not.
When setup finishes to install Ubuntu, we reboot the machine and we should be presented with this screen:


Unfortunately it doesn't happen. We could see a lot of different errors, no matter what, the result is that GRUB isn't capable of loading our preferred OS. Anyway there are good news: if the Ubuntu installation went fine, we don't need to install the OS again, we have to fix GRUB, specifically its configuration file.
First of all, a preamble: this guide cannot be exhaustive since there are such different configurations, systems and situations. We need to pay attention to play with hard disk drives. We have to back up all our data (for example a preexisting Windows partition.
So what's the point? The point is a generic way to mount our filesystem, fix GRUB and install it again. Probably we will need additional informations to get GRUB to work properly and fix the issue in the right way, but internet is great and Google is our friend.

So, without further ado, let's get started.
  1. We will use Ubuntu LiveCD to access our fresh install of Ubuntu. So, let's boot Ubuntu LiveCD as usual: we want to try Ubuntu without any change to our box, even though it's has been installed properly.
  2. At this moment we need to retrieve a couple of informations. We have to know the name of the partition where we installed Ubuntu (available as /) and the filesystem type. We can use GParted to retrieve these parameters:


    In the above example,  /dev/sda3 is our root device, the filesystem is ext3. Run the terminal from theUbuntu LiveCD and execute these commands:

     stefano@SERVER:~$ sudo mkdir /mnt/root
     stefano@SERVER:~$ sudo mount -t ext3 /dev/sda3 /mnt/root
     stefano@SERVER:~$ sudo mount -t proc none /mnt/root/proc
     stefano@SERVER:~$ sudo mount -o bind /dev /mnt/root/dev
     stefano@SERVER:~$ sudo chroot /mnt/root /bin/bash
     root@SERVER:~$ cd /boot/grub/
     root@SERVER:~$ nano grub.cfg

  3. nano is a simple terminal-based text editor. The Page Up and Page Down keys, the Arrow keys, and the Insert key and Delete key all work as in most other text editors.
    Now, before continuing this procedure, we have to understand that GRUB uses a different way to classify the hard disk drives: (hdX,Y). More specifically we  have (hdX=drive where Ubuntu has been installed,Y=partition where Ubuntu has been installed-1). sda = 0, sdb = 1 and so on.
    /dev/sda3 is written as (hd0,2) in grub because Y is always one digit less in (hdX,Y).
    We have to find all occurrences of (hdX,Y) and replace them with (hd0,2).
  4. After that, we can save grub.cfg and install again GRUB executing the command:

     root@SERVER:~$ grub-install /dev/sda
This guide is a work in progress so if you find something wrong, please let me know it.

Best regards